 As a Microsoft Exchange Server focused Premier Field Engineer I spend a considerable amount of my time with customers at their work place and also when they attend training courses and workshops that I deliver. Naturally people want to talk and learn about the cool new features in Exchange 2007 and Exchange 2010, which is great as it shows their underlying passion in the product. What they often do not want to cover is what PowerShell is and how they can use it to enhance their productivity as an Exchange administrator. Since I will be covering various Exchange topics in a series of upcoming articles I wanted to ensure that there was adequate coverage of PowerShell’s underpinning concepts. This article will focus on underlying PowerShell constructs rather than diving straight into the specifics of Exchange and PowerShell.
For part two please click here.
For part three please click here.
A Brief History Of Automating Exchange
Our journey begins with Exchange 2007 which was the first version of Exchange to support PowerShell. Exchange 2007 was a ground breaking product in many ways. It was the first Microsoft server product to fully embrace the 64 bit world (x64, not Itanium), it shipped on a DVD not a CD, had Unified Messaging capabilities, a simplified GUI called the Exchange Management Console (EMC) and the installer also added a shortcut to something called the Exchange Management Shell (EMS). It can be overlooked but EMS is the underpinning of the EMC and for the first time in Exchange it was possible to do more in the shell/script environment rather than the GUI. Additionally it became dramatically easier to perform command line and script operations against Exchange and mailbox enabled users.
If you take a trip back to prior versions of Exchange, there were multiple methods to code and script against Exchange. For the regular Exchange administrator, who does not have a programming background, such methods tended to be avoided due to their inherent complexity. As an example of this, consider this sample code to list Exchange server object(s):
 Const ComputerName = "LocalHost"

 Const WMINameSpace = "root/cimv2/applications/exchange"

 Const WMIInstance = "Exchange ServerState"

 Set ExchangeList = GetObject ("winmgmts:{impersonationLevel=impersonate}!//" & - Computer Name & "/" & - WMINameSpace).InstancesOf (WMIInstance)

 For each ExchangeServer in

 ExchangeList Wscript.Echo "Name: " & ExchangeServer.Name

 Wscript.Echo "Version: " & ExchangeServer.Version

 Next
The Exchange administrator would need to refer to the SDKs to work out how to discover the capabilities of the interfaces provided to them. Not a pleasant task! In addition there were multiple interfaces, and you would need to choose between them, selecting the most appropriate for the task at hand. Thus you would have to become familiar with ADSI, OLE DB, ADO, CDO and CDOEXM if you want to have complete programmable access to Exchange 2000 data structures. These interfaces performed the following functions:
| ADSI | Used manipulate AD objects, including user accounts and groups. |
| CDO | Used to manipulate complex Exchange Server objects, such as messages and attachments. |
| OLE DB | Used to navigate within the Exchange Server Store through languages such as C++. |
| ADO | Used to navigate within the Exchange Server Store through automation languages. |
| CDOEXM | You can use this interface to manipulate Exchange Server objects, such as mailbox and public stores. |
Enter The PowerShell
Exchange 2007 and PowerShell freed the Exchange administrator from these shackles and allowed them to use a shell environment that was designed for administrators from the ground up. The previous sample code can be replaced with the following in PowerShell:
Get-ExchangeServer
The command is definitely more succinct; has a clearer intent than the previous sample and is easy to remember. Currently there are two versions of PowerShell, 1.0 and 2.0. Since PowerShell 2.0 is supported on Exchange 2007 SP2 and is required for Exchange 2010 we will focus on this version. The Windows PowerShell section in the Exchange Server Supportability matrix contains these details amongst may other great pieces of information. To install PowerShell 2.0 in an Exchange server (assuming that you are not using Windows 2008 R2 as it has PowerShell contained 2.0 in-box) please refer to the detailed documentation on TechNet.
Of course all the Exchange 2007 readers will have SP3 deployed now since that is the only supported version of Exchange 2007 at this time, right? If not, then it’s high time to verify SP3 in your lab and then fire up your change management tool! Microsoft provides a detailed search tool, which will quickly show the current support status for a given product.
The PowerShell command mentioned previously, Get-ExchangeServer, is an example of a cmdlet (pronounced command-let) in PowerShell. Note the Verb-Noun structure which indicates what the cmdlet will do and to what entity. This assists in making the cmdlets self-describing. As an example:
Get-Mailbox
Retrieves object’s information
Set-Mailbox
Sets property on the object
Remove-Mailbox
Deletes the object
PowerShell has strict design rules to ensure that there is a consistent and clear approach to the nomenclature and syntax used. This is not the case with the various cmd.exe utilities which demand switches with varying syntax such as a hyphen, space, forward slash or back slash and are not typically tolerant of mistakes. Note that you can still run these cmd.exe tools and utilities in PowerShell. PowerShell is not only built on top of the .NET Framework, it is fully integrated with .NET. The cmdlets are .NET specialized classes, and in addition it is possible to leverage the other .NET classes over and above those that are in cmdlet form. For those with a VBScript background you may remember that VBscript was limited to a subset of the .NET classes and could only access those with a defined COM interface. As an example of this fantastic capability, Jose Barreto demonstrates how to leverage the .NET classes to manage ACLs on NTFS files.
Pipelining – a.k.a. Pass The Parcel
Administrators are typically very familiar with the concept of pipelining, i.e. passing the output of one command to another to smooth the administrator’s workload. This is present in Linux and also the cmd.exe prompt in Windows. While on the surface it may look like PowerShell is doing exactly the same as those other shells, this is not the case. The core difference is that the other shells pass unstructured text between their commands whereas PowerShell passes structured .NET data objects down the pipeline. This is a critical concept to understand as it is this that raises the bar on what PowerShell is able to accomplish. The pipeline symbol is | (for those with English UK keyboards it is not the broken pipe ¦ ), and can be used as follows: cmdlet1 | cmdlet2
Get-Mailbox "User1" | Set-Mailbox –ParameterToChange
How To Discover This Brave New World
One of the fundamental differences between a command line environment and a GUI is that of discoverability. In a GUI, one can become aware of features, settings, capabilities and also how to make changes to the above simply by navigating through the interface. In a command line this discovery is not possible in the same way since it is harder to make the leap from one topic to another to facilitate this learning. That being said PowerShell does have the capability to assist you without having to resort to using Bing to find the relevant command! How to achieve this? It’s a matter of remembering a few initial commands that can then be used to learn and discover the remainder of the command line environment.
What you need to remember:
- Get-PsSnapin
- Get-PSDrive
- Get-Command
- Get-Help
- Get-Alias
- Get-Member
Let’s look at these in turn!
PowerShell Snap-ins
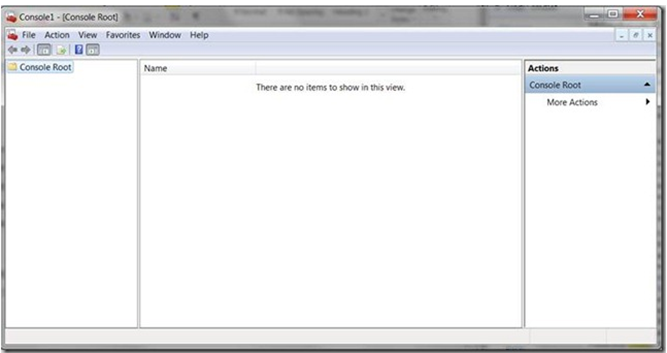
PowerShell can be thought of as an automation framework, though PowerShell by itself is like an empty Management Console (MMC).
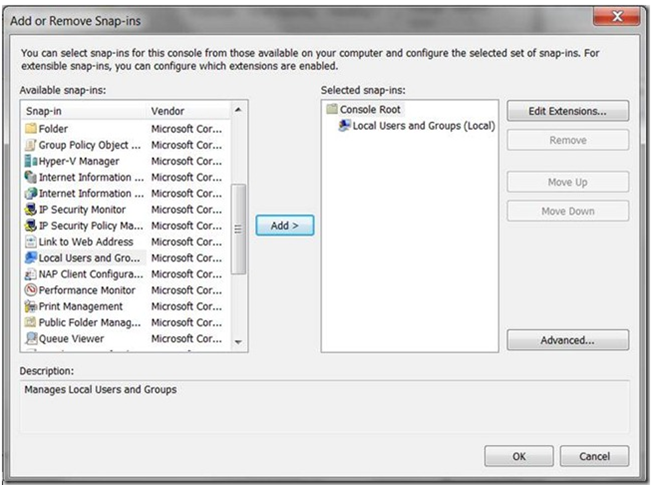
The MMC has great potential but for that to be realized, functionality needs to be added in the form of snap-ins. Adding in the Local Users and Groups snap-in allows the MMC to be used to manage the local user objects.
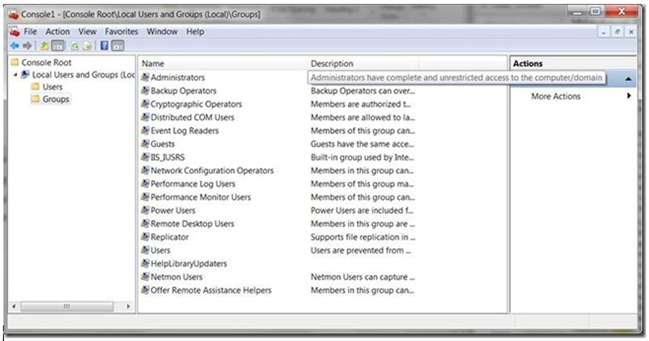
Using the MMC with the Snap-in added, we can set the focus on the Groups container:
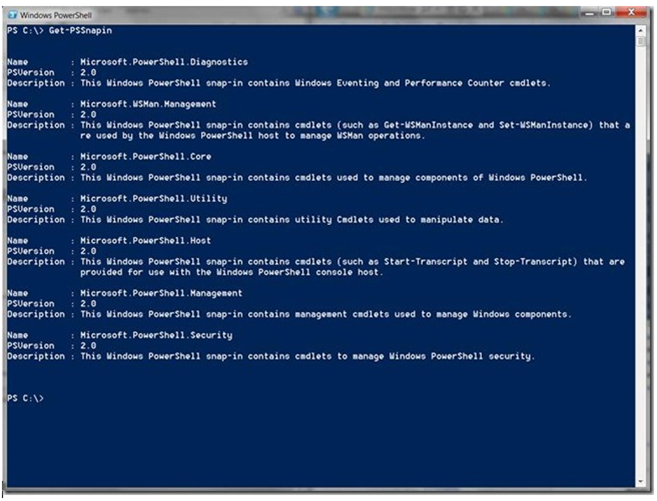
The same can be seen in PowerShell. To do this, open a PowerShell window and run the command:
Get-PSSnapin
It will return the currently loaded Snap-ins within the PowerShell. This is a view of PowerShell 2.0 on a Windows 7 desktop.
Viewing PowerShell Drives
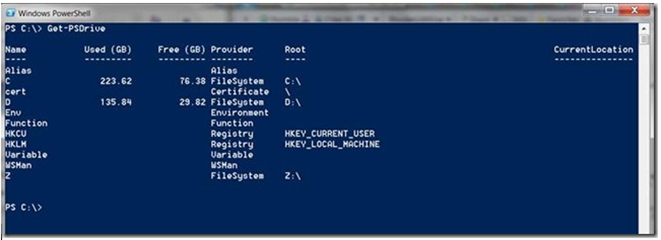
Without a snap-in, PowerShell would not be able to achieve much. A key concept is how the administrator will have the data presented to them. We are familiar with the command prompt showing C: D: and so on; PowerShell provides this and more! PowerShell will abstract other locations and present them in a unified framework. For example you can navigate the registry, certificate store and others as if it were a simple file system! To see these drives use the command
Get-PsDrive
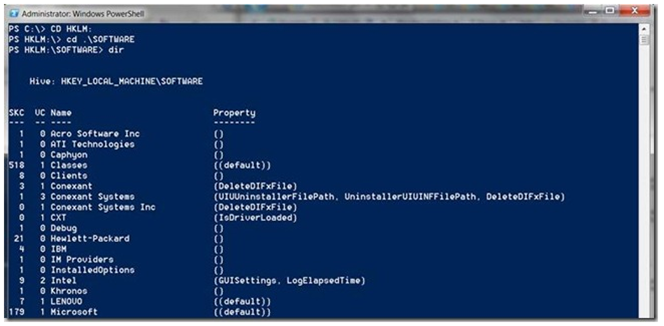
To change to the HKEY_LOCAL_MACHINE PSDrive simply enter:
CD HKLM:
Then press enter.
To return, enter
CD C:
Then press return.
You may have noticed the Providers column in the Get-PsDrive capture. A provider is .NET code that renders the data in a specialized place and makes it available so that it can be easily seen and managed. To see the available providers run Get-PSProvider:
Discovering Commands
What about the commands we can run? This is the good stuff, but how do we discover them? PowerShell contains the cmdlet Get-Command. This will return commands that match your specified criteria. Without parameters, "Get-Command" returns all of the cmdlets and functions in the current session. "Get-Command *" returns all Windows PowerShell elements and all of the non-Windows-PowerShell files in the Path environment variable. Get-Command has excellent filtering capabilities and you can leverage searches like the examples below:
| Search Example: | Purpose: |
| Get-Command *Mailbox* | Returns cmdlets which contain the word mailbox. |
| Get-Command Get-*Mailbox* | Returns cmdlets which start with Get- and contain the word mailbox. |
| Get-Command Set-*Mailbox* | Returns cmdlets which start with Set- and contain the word mailbox. |
| Get-Command -type cmdlet | Filters the results to include cmdlets only. |
Obtaining Help
One you have identified the cmdlet that you want to leverage, typically you will want to read a bit more about it to determine the supported options, etc. Since PowerShell is self-describing, all cmdlets contain help information. To access this information we use the Get-Help cmdlet. So to view help information on the Get-Mailbox cmdlet run:
Get-Help Get-Mailbox
It is also possible to filter and choose the exact type of help that you want to read. When running the Get-Help cmdlet, we can add an extra parameter to tell PowerShell what we want.
| Parameter | Description |
| -Full | The full help information available. The full view of help includes parameter descriptions, examples, and a table of technical details about the parameters. |
| -Detailed | The Detailed parameter requests the detailed view of the help file, which includes parameter descriptions and examples. |
| -Examples | Shows Examples only. |
| -Online | Shows the online version of help instead of local. |
As an example, returning the different levels of help on the Get-Mailbox cmdlet would look like this:
Get-Help Get-Mailbox –Full
Get-Help Get-Mailbox –Detailed
Get-Help Get-Mailbox -Examples
Autocomplete
Though not directly related to the cmdlets that show the PowerShell environment, PowerShell has an outstanding feature that ensures that you are on the right path when entering commands, as typos will cause things not to work too well! PowerShell supports auto completion of entered cmdlets to assist with typing, and also to minimize mistakes. To use the feature enter the start of the command, I like to type enough that PowerShell can filter it down to a nice small subset, then press the tab key to cycle through the options. For example, if I enter the following:
Then press tab, the command changes:
Note that the command completed without having to type the remaining text, and it also became capitalized. This is critical to note as it tells me that PowerShell recognized the command. If the case did not change or autocomplete did not work, then I have a typo that I need to correct. In addition to autocomplete support for cmdlet names, there is also support for completing and discovering the parameters available to each cmdlet. To demonstrate, I will add a hyphen after the Get-Command:
Then press Tab:
Pressing Tab again moves to the next parameter:
If you keep pressing tab, PowerShell will cycle through all the parameters in a loop. To reverse the direction, use Shift + Tab to go back.
PowerShell Aliases
PowerShell also supports the concept of aliases, where a cmdlet can be invoked using a different name. This can shorten the amount of typing, and also provides a migration path to PowerShell for people transitioning from other environments. Administrators with a Linux background will find that there are predefined aliases for MAN and LS, which are for the Get-Help and Get-ChildItem cmdlets respectively. But such predefined aliases are not limited to those with a Linux upbringing, they are also for Windows administrators. In fact in PowerShell when you run commands like DIR, CLS, DEL you are actually using an alias. To see the mapping between the DIR alias and the underlying cmdlet, run:
Get-Alias DIR
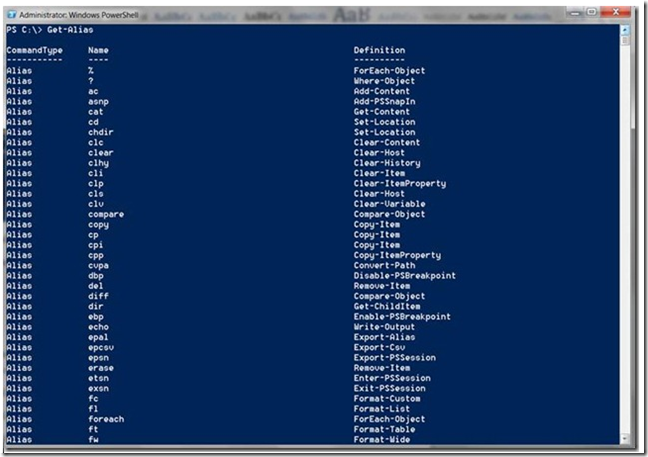
To see all defined Aliases, run
Get-Alias
What can I do to that Object With PowerShell?
A common question at this point is what can we actually do to the various objects that PowerShell interfaces with, be it an NTFS folder or Exchange mailbox. Again due to the self describing nature of PowerShell this information is readily on hand and is retrieved with a cmdlet. The cmdlet in question is:
Get-Member
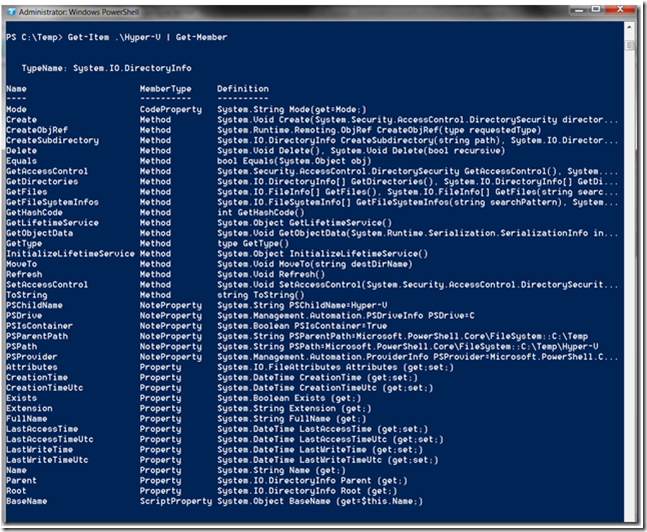
In the following example we want to see all of the properties and methods that are available on a folder called C:\Temp\Hyper-V.
Note that we are retrieving an object representing the Hyper-V folder and then passing it down the pipeline to the Get-Member cmdlet. The Get-member cmdlet then enumerates the properties and methods that are available. For the non-programmers reading this, they may be wondering about the difference between a property and a method. They can be readily likened to a noun and a verb in language, i.e. a description word and a doing word. When applied to a person, a property could be the person’s name, address or ice cream preference. Similar methods applied to a person could be go buy ice-cream, sit down or drink beer. Some properties are read only whilst some are writable, this will vary depending on the exact object you are reviewing.
Concluding Notes
We have reviewed some of the history with Exchange scripting and automation and demonstrated how you can start to discover the various commands in PowerShell. Investing time in your skillset and learning PowerShell is guaranteed to repay itself over and over. Not only can you perform operations in PowerShell that would have been harder using some traditional toolsets, but PowerShell adoption is spreading rapidly. Exchange, SQL, DPM, VMM, Windows amongst many others now embrace PowerShell.
In summary remember the following commands and they will assist in discovering the correct information in PowerShell.
- Get-Command
- Get-Help
- Get-Alias
- Get-PsSnapin
- Get-PSDrive
- Get-Member
If you have comments or feedback about this or any other content posted, please leave a comment. Comments suggesting future topics are always appreciated too!
For part two please click here.
For part three please click here.
Cheers,
Rhoderick
