The below content is superseded -- for information on updating your certificates please see:
Active Directory Federation Services (AD FS) heavily leverages X.509 certificates to allow the solution to function securely. As with all of the other certificates that you deploy within your enterprise, there must be a process to manage and renew certificates prior to them expiring. If a certificate expires this can be summarised quite simply as not good!
The Office 365 Portal will provide notifications to indicate that one or more of your AD FS certificates will expire shortly. This may be the SSL certificate, service communication certificate, token decryption or token signing certificates. If one of these are about to expire, you will get the alert as shown below in the Office 365 Portal.
Clicking the link in the alert will take you to: Renewing Federation Certificates for Office 365 and Azure AD. That will walk you through renewing the token decryption and token signing certificates. This blog post discusses renewing the SSL certificate and service communications certificate.
In the AD FS management console, the certificate expiration dates are highlighted.
The PowerShell commands to get the same information on the AD FS servers are: Get-AdfsCertificate and Get-AdfsSslCertificate
On the Web Application Proxy (WAP) servers we can use Get-WebApplicationProxySslCertificate. More on the PowerShell cmdlets later.
What’s The Worst That Can Happen If I Don’t Do This?
If you do not follow your process to renew AD FS certificates, or see the additional prompt in the Office 365 Portal, then expect the wheels to fall off the bus.
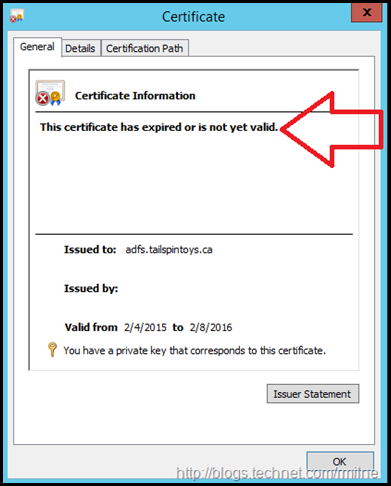
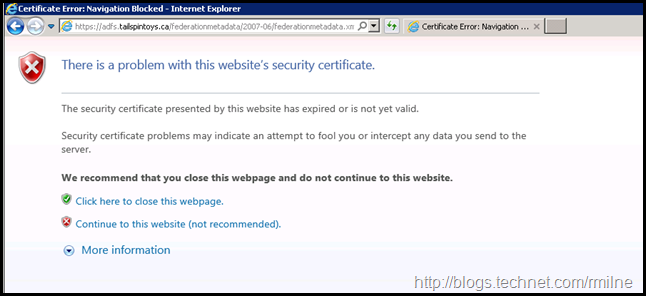
Users will be unable to access Office 365 services in most cases. The below are some images that you will most likely NOT want to see in production. The below SSL and service communication certificate has expired. The below images were taken after the 8th of February 2016.
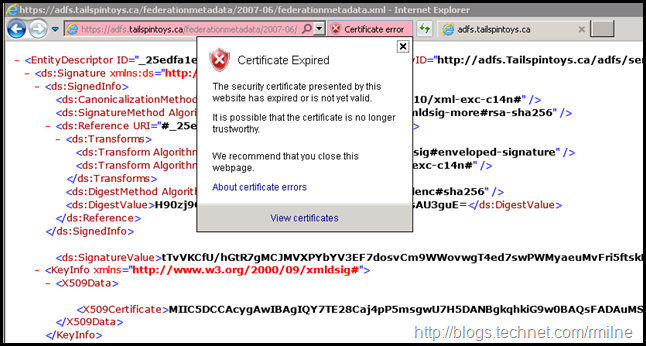
If we then browse to the AD FS metadata page, IE is not happy either.
Clicking to continue on, we can then review the certificate.
Telling users that the above is situation is fine to proceed, is unacceptable and irresponsible on our part. All that we are doing is teaching people that it is OK to click here to either see the dancing pigs, or re-confirm your online banking credentials. Not good.
This is why it is critical that we proactively renew certificates so we provide a secure environment to users, and promote correct behaviours.
That’s enough doom and gloom, time to get back to ensuring this does not happen!
AD FS Certificates
If we review Certificate Requirements for Federation Servers on TechNet, there are multiple certificate types that come into play. To list them out:
- Token-decryption certificate
- Token-signing certificate
- Secure Sockets Layer (SSL) certificate
- Service communication certificate
By default the token signing and token decryption certificates are self signed and will automatically manage themselves in the default configuration. As long as Office 365 is able to retrieve the AD FS metadata, then Office 365 automatically updates with no additional scripts or manual intervention. Note – this assumes that you are current on Windows updates, else the certificates do not roll over properly. Blog post on that later.
The last two are separate but are often blended together. By default, the service communication certificate uses the same certificate as the Secure Sockets Layer (SSL) certificate. Federation servers use a server authentication certificate, also known as a service communication for Windows Communication Foundation (WCF) Message Security.
Regarding the SSL certificate, Federation servers use an SSL certificate to secure Web services traffic for SSL communication with Web clients and with federation server proxies.
Because of this, we have two PowerShell commands to manage the SSL certificate and service communication certificate. The commands are Set-AdfsSslCertificate and Set-AdfsCertificate. They are very similar, and appear to be the same but are not.
If we look at them this way the difference is more apparent.
Set-AdfsSslCertificate
Set-AdfsCertificate
Keep in mind that there are two separate commands and we will come back to them later in the post.
Note that the GUI is not used in this post as it is not able to perform all of the changes we require to update the certificates in Windows Server 2012 R2 AD FS.
A high level overview of the steps we will perform are:
- Obtain new certificate
- Install new certificate on all AD FS servers
- Install new certificate on all WAP servers
- Set SSL certificate on all AD FS servers
- Set Service Communication certificate
- Set SSL certificate on all WAP servers
- Verify and test
Obtain New Certificate
This section is not only about requesting a new certificate, but also about ensuring that it is correctly installed and then preparing for the subsequent steps.
There are a few ways in which you can request a SSL/TLS certificate. Some Exchange people use the Exchange toolset to do this, though you may not be able to do so. In such cases we can use this process How To Request Certificate Without Using IIS or Exchange to manually generate the certificate request and process it directly on an AD FS 2012 R2 server. Please see the aforementioned blog post on the details, and how to edit the template. The certificate used here only has a subject name, there are no SAN entries. Your use case may also involve Device Registration, and have an additional name on the certificate.
We will generate the new certificate with the same name as before: adfs.tailspintoys.ca
Certreq.exe is used to generate the pending certificate request, which is called newcert.req.
The pending request (newcert.req) was then submitted and processed by the issuing CA. Follow the steps in your vendor’s documentation to complete this process. The signed response from the CA has been copied back to the same AD FS server and is the file called adfs_tailspintoys_ca.cer.
Certreq.exe is then used to mate the pending request with the signed CA response.
Part of my standard certificate drills are to then immediately check to ensure the following are OK:
-
Certificate subject name is correct – ensure there are no typos!
-
Certificate Subject Alternative Names (SAN) are correct – SAN names might not apply in your environment.
-
Valid from
-
Valid to
-
Certificate has private key
-
Certificate chains correctly
-
Any intermediate CA certificates that were required to be updated
The last point is important. With the move to SHA2 certificates, there is a good chance that a different intermediate issuing CA is going to be used. What is the best thing to do? Read the documentation from your CA provider, and follow the installation instructions that come with your certificate. Some vendors have a tool that does all this for you, others require you to manually install updated certs. Either will work, you must ensure that the requisite steps are performed.
We need to know the new certificate’s thumbprint so that we can specify it in later steps. To determine the thumbprint, one option is to list the certificates in the local machine store using PowerShell:
Get-ChildItem –Path Cert:LocalMachine\my
The above is the bare minimum to type, and will show all the certs in the local machine’s store. If you have several, the following command may be more beneficial:
Get-ChildItem -Path Cert:LocalMachine\my | Select-Object FriendlyName, Thumbprint, Subject, NotBefore, NotAfter
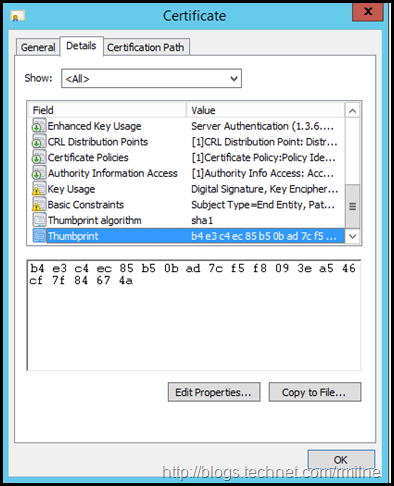
The thumbprint can also be obtained by looking at the certificate’s properties in the certificate MMC. Note the highlighted line below:
In this case the thumbprint is B4E3C4EC85B50BAD7CF5F8093EA546CF7F84674A – yours will be different.
Now we have our shiny new certificate. This needs to be exported out, and deployed to the other servers. To export the certificate, we can use the certificate MMC, just be sure to chose the option to export out the private key. Hint – if the file type is not .PFX then you have not chosen to export the private key. A strong password was set during the export operation, as we want to provide as much protection as possible.
Alternatively you can export out using Export-PfxCertificate.
Install New Certificate on All AD FS Servers
The certificate needs to be deployed onto the remaining AD FS servers. As with the export there are different ways to accomplish this. For example:
- Double click the .PFX file and import using wizard
- Open certificate manager, and import to the local computer’s personal store
- Use Import-PFX
As with the initial install, ensure the following are OK:
-
Valid from
-
Valid to
-
Certificate has private key
-
Certificate chains correctly
-
Any intermediate CA certificates that were required to be updated were updated
Install New Certificate on All WAP Servers
The same process to copy over and install the certificate needs to be followed on all WAP servers.
Set SSL certificate on all AD FS servers
Now that the new certificate has been deployed, onto all of the AD FS servers we can then enable it as the SSL certificate using PowerShell
Set-AdfsSslCertificate –Thumbprint XXXXXXXX
In our example this will be:
Set-AdfsSslCertificate –Thumbprint B4E3C4EC85B50BAD7CF5F8093EA546CF7F84674A
This step must be performed on all AD FS servers.
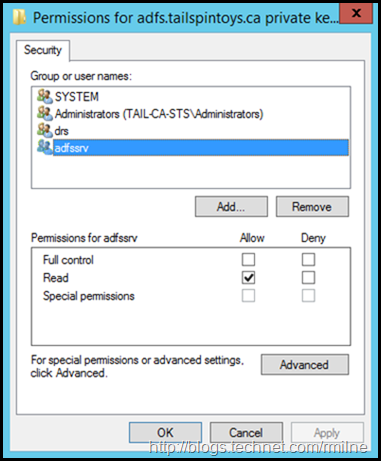
The AD FS service account[s] also require access to the new certificate’s key. If we look at the certificate’s private key permissions after running the previous command, note the ACLs that are present:
Manually adding those permissions was not required in this lab. In TechNet's Obtain and Configure an SSL Certificate for AD FS article it states:
The following message will inform you that you need to set the private key permissions correctly on the new certificate: “Ensure that the private key for the chosen certificate is accessible to the service account for this Federation Service on each server in the farm.” Update the permissions on the SSL and the service communication certificates to allow Read access for the AD FS service and DRS services. You have to complete the following procedure on all federation servers in your farm.
We can look at the HTTPS.sys binding using netsh http show sslcert
Do NOT make modifications using netsh in AD FS 2012 R2. It is mentioned as a read only verification step here.
Set Service Communication certificate
This is where we come back to the two cmdlets referenced at the start of this post. In the previous section we ran the Set-AdfsSslCertificate cmdlet. Now we must also run the Set-ADFSCertificate to complete the process. Execute the Set-ADFSCertificate command only on the Primary ADFS node. If you are not sure which is primary, run Get-AdfsSyncProperties. Note this command is not to be executed on every AD FS server. It is to be executed once. Stating to execute the Set-ADFSCertificate on the primary is a simple statement and covers all cases.
We have to instruct AD FS to use the new certificate for the service communications cert. This is done using PowerShell:
Set-AdfsCertificate -CertificateType Service-Communications –Thumbprint XXXXXXX
In our example:
Set-AdfsCertificate -CertificateType Service-Communications –Thumbprint B4E3C4EC85B50BAD7CF5F8093EA546CF7F84674A
As prompted, restart the Active Directory Federation Services service (adfssrv) on all AD FS servers in the farm.
Set SSL certificate on all WAP servers
To enable the SSL certificate on the WAP servers, we need to run Set-WebApplicationProxySslCertificate on each server. Remember that the new certificate was previously deployed to all WAP servers. In this stage we are simply enabling it.
Set-WebApplicationProxySslCertificate -Thumbprint XXXX
In our example:
Set-WebApplicationProxySslCertificate -Thumbprint B4E3C4EC85B50BAD7CF5F8093EA546CF7F84674A
Verify and Test
At this point we need to test and ensure that AD FS is able to authentication and sign in clients internally and externally.
Cleanup –Optional
Once you have verified that all aspects of AD FS are functioning, you may want to go back and archive the old SSL certificates from the servers to keep the certificate stores clean.
Automating AD FS Service Certificate Change
If you wish to automate or script changing the SSL/TLS certificates, then you are in luck! Pierre Audonnet has published the below script to the TechNet scripting gallery to help with automating this change.
Bootnote
For reference TechNet has the following verbiage on the certificate cmdlets for AD FS servers.
The Set-AdfsSslCertificate cmdlet sets an SSL certificate for HTTPS bindings for Active Directory Federation Services (AD FS) and, if configured, the device registration service. The subject name of the specified certificate must match the federation service name. Use this cmdlet to change the SSL certificate associated with the AD FS service. You must run this cmdlet on each AD FS server in the AD FS farm
The Set-AdfsCertificate cmdlet sets the properties of an existing certificate that Active Directory Federation Services (AD FS) uses to sign, decrypt, or secure communications..
All of the AD FS Cmdlets in Windows PowerShell are listed here.
Cheers,
Rhoderick






Appreciate your post, very well written!