There have been many great improvements to the Exchange Server installation process in recent years. Exchange 2010 gave us the ability to perform incremental deployment, where all mailbox servers start off as a regular mailbox server and then we can add it to a Database Availability Group (DAG). Exchange 2007 introduced the ability to run a recover server operation in a nice easy format with the /RecoverServer setup parameter. This /RecoverServer feature is present in Exchange 2016. As before, it make it very straight forward to recover Exchange servers.
RecoverServer is used to bring a failed machine back in a few different scenarios. There is the normal purpose which is to recover a server to bring it back into production. Additionally since it is not supported to remove an Exchange 2007 or newer server using ADSIEdit, /RecoverServer also comes into play to allow us to gracefully uninstall a server when the machine was removed unexpectedly. For example if we are in the process of decommissioning an Exchange server, if the hypervisor admin deletes the Exchange server VM before Exchange was correctly uninstalled, then we are left with residual configuration data for that now defunct Exchange server. If we want to gracefully remove this Exchange server, it is required that the machine is brought back so that it can be properly uninstalled using the standard Exchange setup procedures.
In this post we will step through recovering an Exchange 2016 CU4 server. The server to be recovered is called Exch-2. This machine was not added to a DAG. See the note at the end if you are recovering a DAG server.
It is possible to use backup to restore the OS of an Exchange server, but this is redundant as Exchange will store all of the necessary configuration data in AD. There are only a few setup tasks that are required at the end of setup.
Preparation
Long before the Exchange setup routine is launched, there are several prep items that must be addressed. This post also assumes that the server in question has been taken out of production by removing it from the load balancer etc.
The server must be restored as-is. The Windows installation must be the same as before, and the same goes for Exchange. The version of Exchange can be obtained by running Get-ExchangeServer and consult your build documentation for the specifics of the OS build.
After confirming the Windows server details a new machine is to be installed with exactly the same computer name.
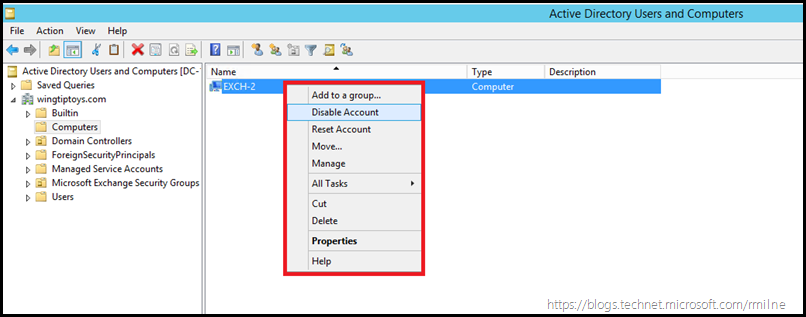
Prior to joining this new machine to the AD domain, it is recommended that the existing computer object is disabled. DO NOT DELETE the existing computer object. It is to be disabled to that the new system can take over the object in a more graceful manner. In the screenshots below, you can see that the computer object called Exch-2 is being disabled.
Using Active Directory Users and Computers, right click on the correct computer object and chose to disable it.
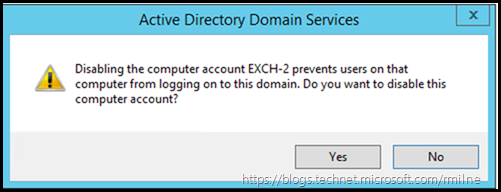
You will be asked to confirm the request. If this is the correct computer object, click yes.
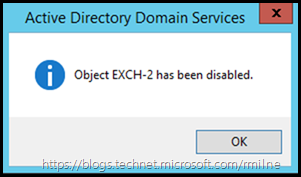
Finally the computer object is disabled.
Note that the icon has changed, and there is a downward arrow on the object which indicates that it is disabled.
The newly built server can now be added to the domain, using your standard process.
Verify that the status of the computer object has transitioned to enabled. You may need to wait for AD replication and also to refresh the view.
It is not required that the server have the same IP address, though this will simplify matters and in most cases the same IP will be used. If the same IP address is not being used, ensure that DNS has been correctly updated.
It is always advisable to check AD site membership prior to installing Exchange. One method is to run nltest.exe /DSGetSite
Pending OS updates should also be installed, ideally this would have happened during the OS build process. Unpatched servers should not be running on a production network.
Additional steps are required to streamline the Exchange recovery process. The required OS components are to be installed prior to attempting the recover of the server. Depending upon the OS in use, there will be different setup prerequisites. Consult the Exchange 2016 prerequisites documentation on TechNet for the lastest updates. The below example is for Exchange 2016 when installed onto Windows Server 2012 R2
Install-WindowsFeature AS-HTTP-Activation, Server-Media-Foundation, NET-Framework-45-Features, RPC-over-HTTP-proxy, RSAT-Clustering, RSAT-Clustering-CmdInterface, RSAT-Clustering-Mgmt, RSAT-Clustering-PowerShell, Web-Mgmt-Console, WAS-Process-Model, Web-Asp-Net45, Web-Basic-Auth, Web-Client-Auth, Web-Digest-Auth, Web-Dir-Browsing, Web-Dyn-Compression, Web-Http-Errors, Web-Http-Logging, Web-Http-Redirect, Web-Http-Tracing, Web-ISAPI-Ext, Web-ISAPI-Filter, Web-Lgcy-Mgmt-Console, Web-Metabase, Web-Mgmt-Console, Web-Mgmt-Service, Web-Net-Ext45, Web-Request-Monitor, Web-Server, Web-Stat-Compression, Web-Static-Content, Web-Windows-Auth, Web-WMI, Windows-Identity-Foundation, RSAT-ADDS –Restart
Note the –Restart is added since this requires the server to be restarted to complete the install. Pending file actions will block the installation of .NET Framework, which is why the server will automatically restart.
Once the server has restarted, ensure that the components are all installed.
Ensure correct version of .NET framework is installed. This will depend upon the exact CU which was previously installed. See Exchange 2013 CU16 and Exchange 2016 CU5 .NET Framework Requirement.
If .NET framework 4.6.2 has to be installed, again restart the server once the installation has completed. Verify the installed version of .NET once the server has restarted using the process in the abovementioned post.
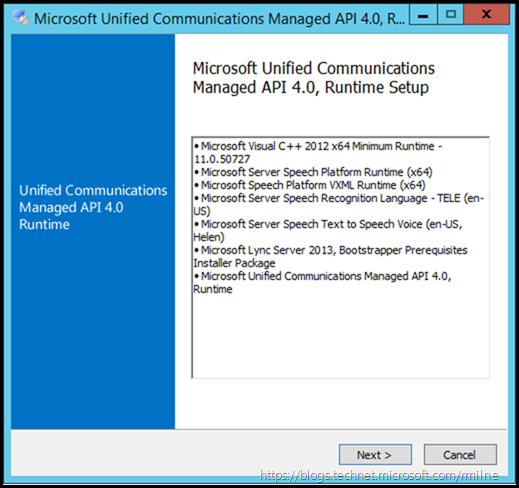
The Exchange Unified Communications Managed API 4.0 must also be downloaded and installed. This again will require a restart to action pending file copy operations.
If the server is not restarted to apply the pending file operations, Exchange setup will fail as this is one of the items it will check for. Far better to know that the server is in a known good state rather than trying to save a couple of minutes by not rebooting the machine.
Optionally the SSL/TLS certificate can be installed onto the Exchange server at this time. If preferred this can be done after Exchange setup has completed the /RecoverServer process. personally I prefer to copy the certificate at this point so that the maximum amount of work has been done in advance. The certificate install should also be verified using your standard process to ensure that the private key has been correctly installed along with any other required intermediate certificates. Do not skip the verification process. For example, if you are importing a certificate from a .DER file then the outcome will not be good if you expect users to be able to create a SSL connection to that certificate......
At this point the pre-requisites should all be in place. Note that there may be others which are specific to your environment. Ensure that all of your required processes are followed.
Launch Exchange Setup
Copy or mount the correct version of the Exchange setup files on the server to be recovered. The Exchange version was something you identified previously. Ideally you are proactively updating and patching servers so that the latest version was previously installed.
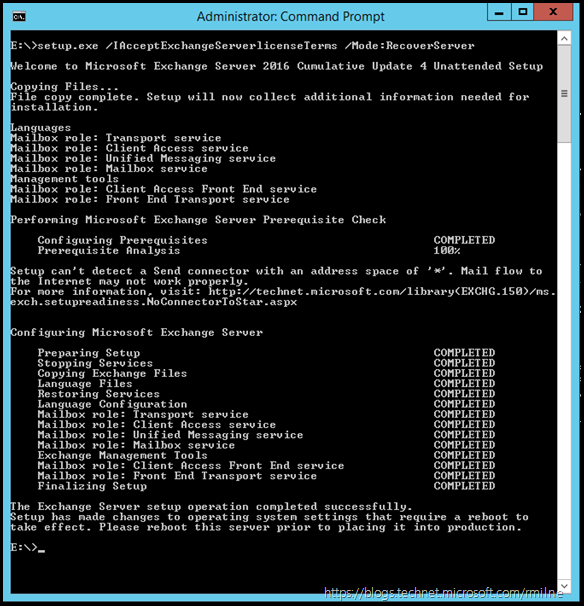
setup.exe /IAcceptExchangeServerlicenseTerms /Mode:RecoverServer
The server will require a restart. Once the server has restarted, ensure that:
- SSL bindings are correct
- Required OS services are running
- Exchange services are running
- Event logs do not have error
- Managed Availability has no issues
- Install required party apps
- Ensure file system AV exclusions are correct
- Add server to DAG (if required)
- Database copies to be added back (if DAG server)
Once the server has been confirmed as running correctly, then it can be returned to production.
Recovering DAG Server
The server to be recovered is to be removed from the DAG prior to initiating the /RecoverServer command. From another Exchange server, the passive database copies can be removed from the failed server. Note that if the server has the only copy of a given database, that does not need to be removed. Once all DB passive copies have been removed the mailbox server can be removed from the DAG. At this point the /RecoverServer command can be executed. In effect, the server to be recovered is now a non-DAG server. Once the recovery process has completed it can be joined into the DAG and mailbox copies added back as per the original layout.
Cheers,
Rhoderick
