Demystifying Outlook Auto-Configuration – Part One
Exchange administrators will inevitably run into issues with the interaction between the Outlook client and Exchange server. So how can we identify the configuration data that is sent to Outlook from the Exchange server, and troubleshoot?
This article will describe how to analyse the data returned to Outlook to assist with troubleshooting Exchange server issues. At the time of writing Outlook 2003 and Exchange 2003 have left their extended support window, thus we will not talk about them.
There are several mechanisms which are used by Outlook to connect to the Exchange server which are separate and distinct, and this configuration will vary depending if Outlook is running inside the corporate network or remotely, i.e. in Starbucks. The first question to ask is how Outlook knows where to query for its configuration data. That is where Autodiscover comes in to play. To prevent slaying innocent pixels; pop on over to my blog and read this Autodiscover post to understand how this works for domain joined and non-domain joined machines.
You will note that I did not mention Exchange 2003 or Outlook 2003 above. This is because neither of those two products supports Autodiscover.
Now that you can see how Outlook knows where to get the configuration data from what does it then query for? Outlook needs to know where to go for:
-
Web services
-
RPC mail end point
-
Directory Service
-
Outlook Anywhere endpoint
All of the above information is returned to the client via Autodiscover. Let’s take a look at the Autodiscover payload to better understand it. To see the Autodiscover information there are two main ways to do this:
-
Test Email Address AutoConfiguration
-
Enable Outlook Diagnostic Logging
In this post we will use the Test Email Address AutoConfiguration.
In the examples below we will use Exchange 2010 and Outlook 2010.
Test Email Address AutoConfiguration
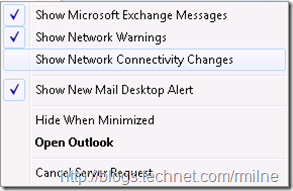
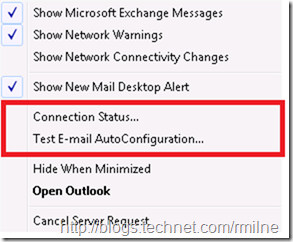
When Outlook is running, hold down the control key and right click the Outlook icon in the system tray. Note that the image on the right was taken with the control key and right click combo whereas the left one was not.
Because the control ley was not depressed the image on the left does not have the “Connection Status” or “Test E-Mail AutoConfiguration” options.
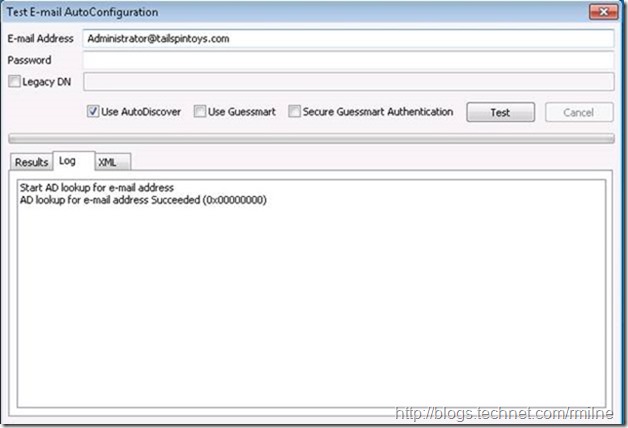
Clicking the Test E-Mail AutoConfiguration will open a new window. Outlook will make a LDAP query to AD to populate the email address portion of the form. You can see this via NetMon or by clicking onto the Log tab.
Note that since this we are testing Exchange the “Use Guessmart” and “Secure Guessmart Authentication” options are not needed they can be unchecked. They are used for POP and IMAP service discovery. We can then click on the Test button to launch the Autodiscover process. By default you will see something like this:
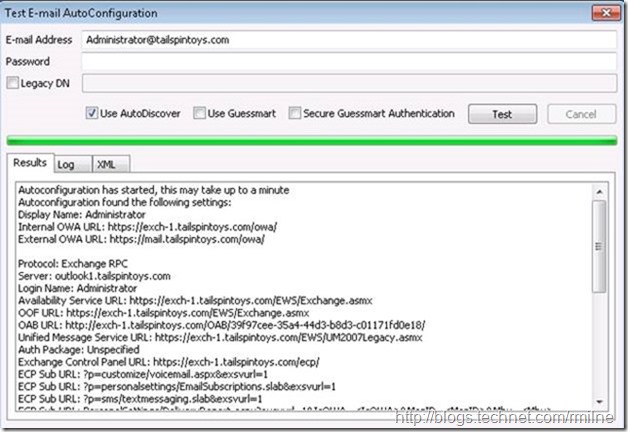
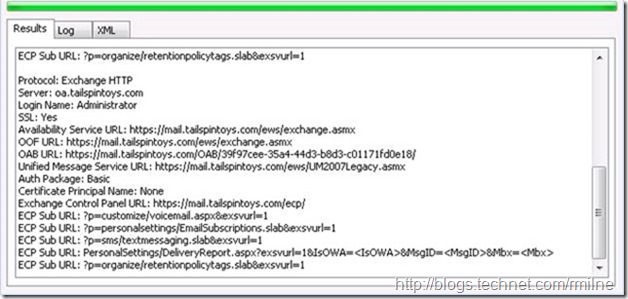
Scrolling down to see what is also included on the results tab may show different things depending on the services that are enabled for your mailbox and Exchange organisation. In this case we can see the Outlook Anywhere settings. We will get into the detail of what each line means later, for now let’s concentrate on the high level results. The results tab marks up the returned content from the web service. Consider this like looking at an XML file in Internet Explorer.
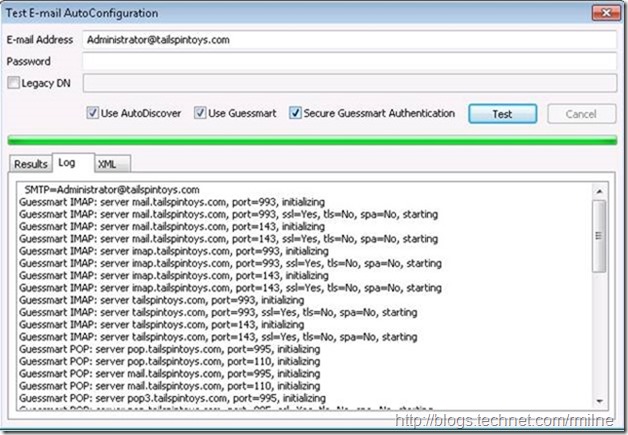
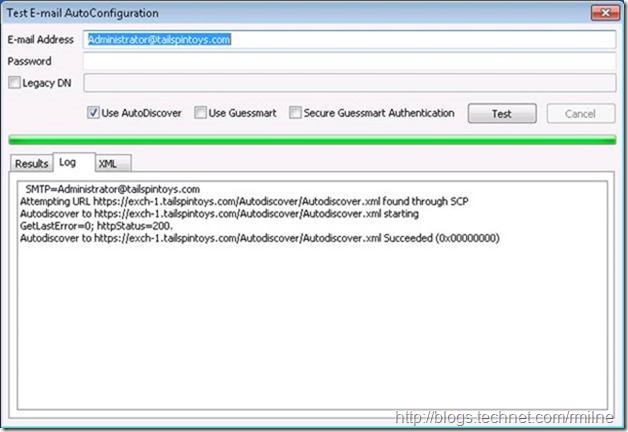
This means that Autodiscover located a server to send its query to, and some answers were sent back. Note that if the “Use Guessmart” and “Secure Guessmart Authentication” options were left enabled you would see this:
The Log tab will show the server(s) that were contacted and the status of each
In this case we can see that an Exchange server was found via a SCP lookup. The query was then sent to its Autodiscover virtual directory which succeeded and this completed the Autodiscover process.
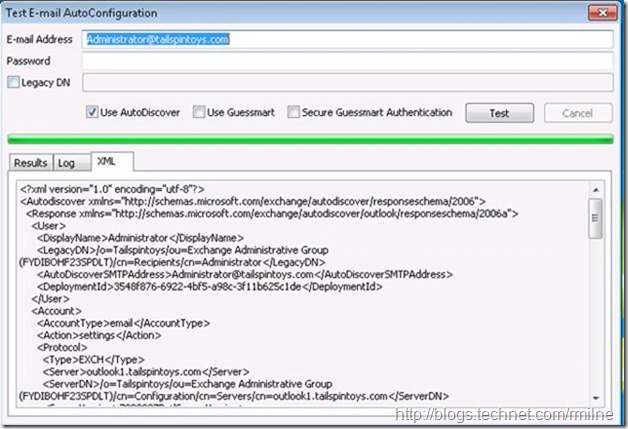
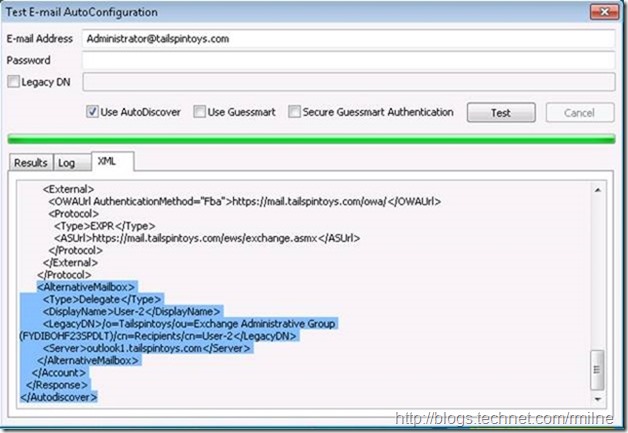
The final tab is the XML section, where the raw XML response from the Autodiscover web service is displayed. Consider this like looking at an XML file is Notepad J
While the XML tab may look gnarly and somewhat unfriendly it does have some great advantages - you can see all of the XML payload.
Should you prefer to read the XML in a different tool to improve readability, then you can select all the XML content with Ctrl + A then doing the Ctrl + C.
In my example the XML payload shows me that I have delegate access to another mailbox which belongs to User-2.
Additionally you will see your Online Archive mailbox listed here in the AlternateMailbox section if one was provisioned.
Cheers,
Rhoderick

