Renewing certificates breaks down into the following main sections
- Create Certificate Signing Request
- Send Certificate Signing Request to the Certification Authourity to be signed
- Complete Certificate Signing Request
- Install certificate on additional servers
- Bind Services to newly completed certificate
As always, ensure that the names you have specified on the CAS namespace design are included. There is nothing more annoying than missing a name in the certificate or discovering there is a typo in one of the names when your are in the middle of a change window. In my example, the below names are included in the request, though your names will vary.
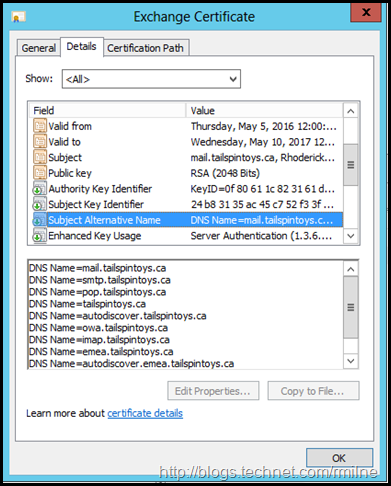
mail.tailspintoys.ca, smtp.tailspintoys.ca, pop.tailspintoys.ca, tailspintoys.ca, autodiscover.tailspintoys.ca, owa.tailspintoys.ca, imap.tailspintoys.ca, emea.tailspintoys.ca, autodiscover.emea.tailspintoys.ca, mail.emea.tailspintoys.ca
You can also review this post for CAS Namespace Planning.
Renewing Certificate Using Exchange 2010 MMC
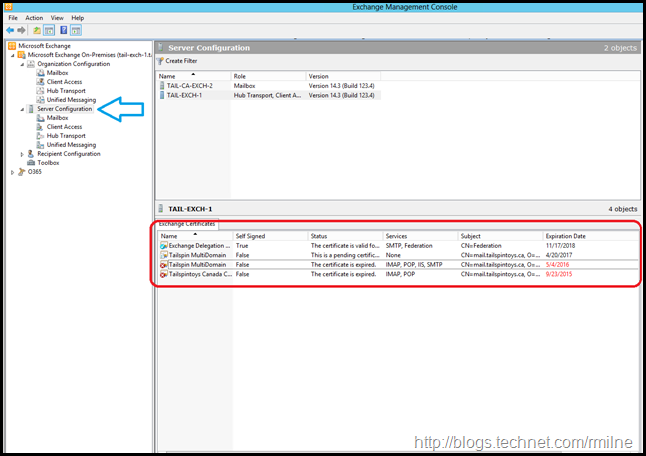
The key to staring the operation is to place the focus on the Server Configuration in the left hand tree. This will display the certificate management UI which was added in Exchange 2010 SP1. The second critical thing to remember is to chose the correct server. This is especially important when generating the certificate as the request and completion operations need to be done on the same server.
If we highlight the certificate we wish to renew, then additional content sensitive options appear on the right hand tool pane.
The same option also appears when right clicking on the certificate.
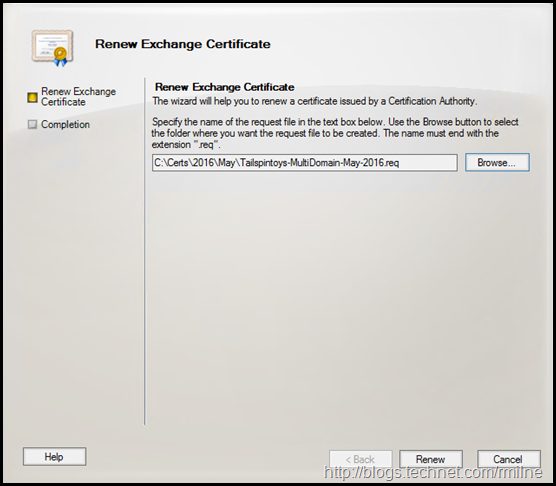
The Renew Exchange Certificate wizard starts. Helpfully it provides a nice UI to browse and save the certificate request file. This can also be done using PowerShell though the syntax is a little more intense.
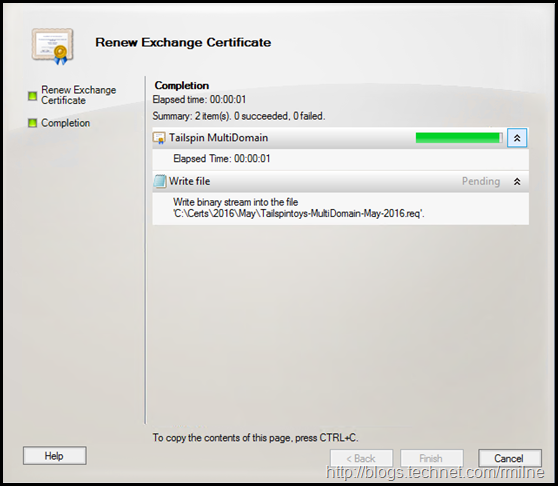
After clicking renew, the certificate signing request is saved.
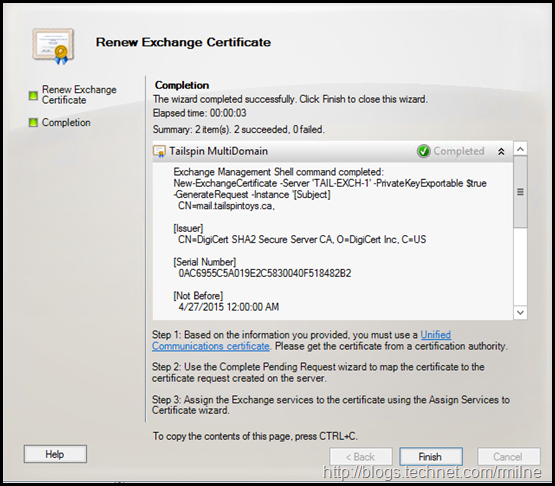
When complete, the PowerShell commands issued as shown. Not seen below is the code which does the remote PowerShell file save.
An example of this would be:
$CertData = New-ExchangeCertificate -GenerateRequest -FriendlyName "Tailspin MultiDomain" -PrivateKeyExportable $true -SubjectName "CN=mail.tailspintoys.ca, O=Tailspintoys, L=Mississauga, S=Ontario, C=CA" -DomainName mail.tailspintoys.ca, smtp.tailspintoys.ca, pop.tailspintoys.ca, tailspintoys.ca, autodiscover.tailspintoys.ca, owa.tailspintoys.ca, imap.tailspintoys.ca, emea.tailspintoys.ca, autodiscover.emea.tailspintoys.ca, mail.emea.tailspintoys.ca
Set-Content -Path "C:\CertRequest.req" -Value $CertData
Reviewing Pending Request
At this point the CSR is not completed and is in a pending state. This can be seen in the Exchange Management Console.
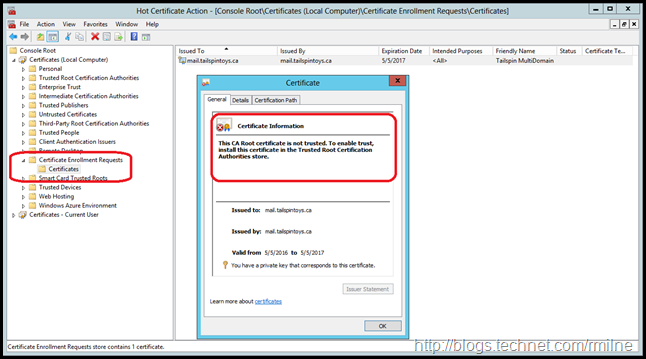
And since the underlying OS holds the certificate, it can also be found in the Certificate Enrolment Requests container.
Submit Certificate Signing Request to CA
It is required to send the CSR to the CA so that the request can be processed and if approved, then signed.
Typically the CSR file is uploaded to the CA, which will then sign it. Different CAs will return different certificate packages.
Please ensure your follow their process and documentation.
Complete Certificate Signing Request
Once you receive the signed CSR from the CA, it can be used to complete the pending certificate.
However, before proceeding ensure that you read the instructions. You may need to manually install a new or updated intermediate CA. If you forget to do this, then you will run into issues.
Ensure that you place the focus on the correct server, i.e. the one where you generated the CSR.
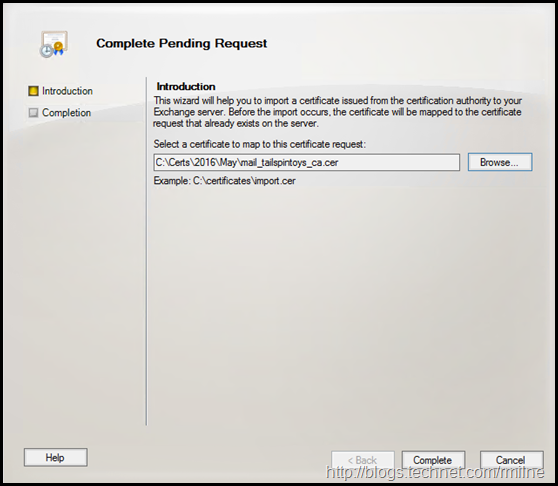
Then we can select to Complete Pending Request
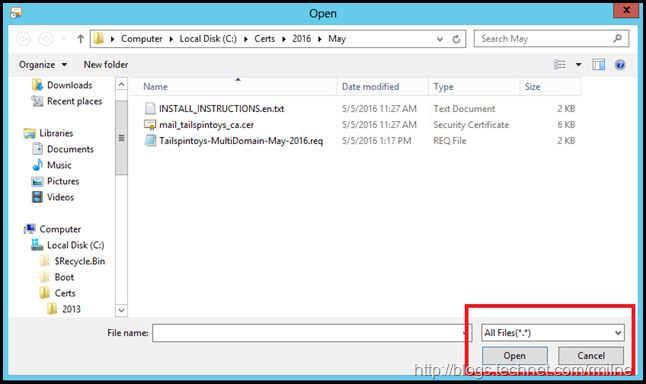
It may be necessary to change the file type in the browse window. Browse to the signed CSR you obtained from the issuing CA.
After selecting the signed CSR file, we can complete the wizard.
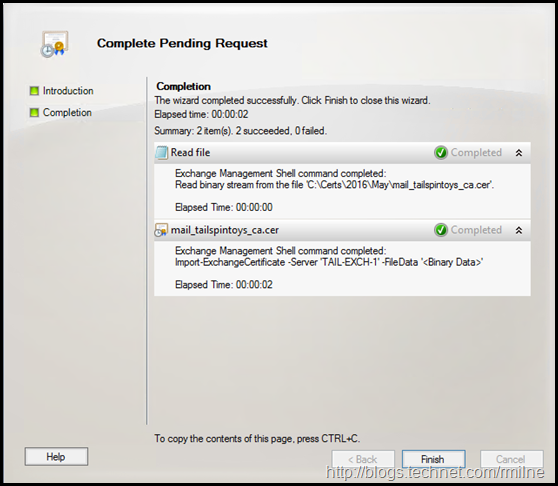
The wizard completes, and the certificate is installed.
Verify Completed Certificate
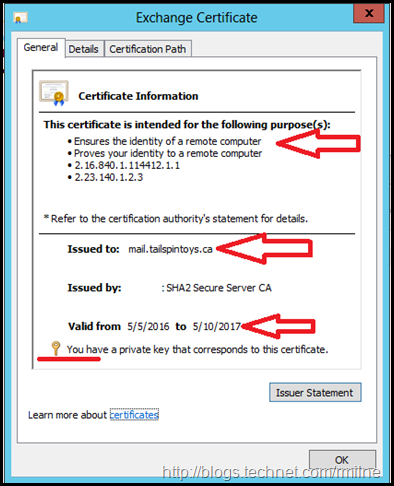
Always ensure that the certificate is correctly installed and the expected files are present.
The below shows some things to look at:
- Issued to
- That a private key s present
- Valid From and Valid To dates are correct
Ensure that the SAN entries are all correct. It is so easy for typos to occur.
Export Completed Certificate
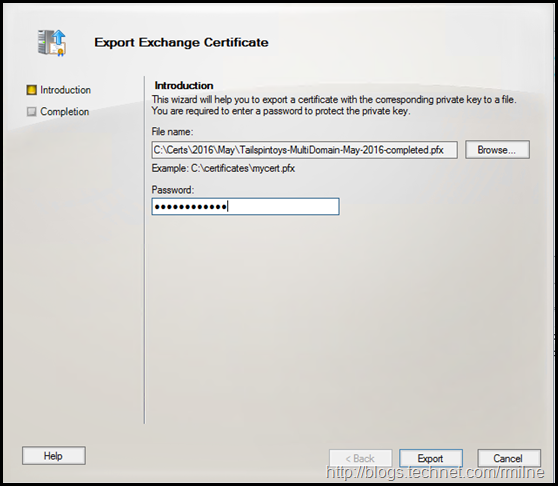
If you have multiple servers, you will need to export the completed certificate to a .PFX file so that the private and public keys can be imported to your other server(s).
Ensure that you export to .PFX and that a strong password is used.
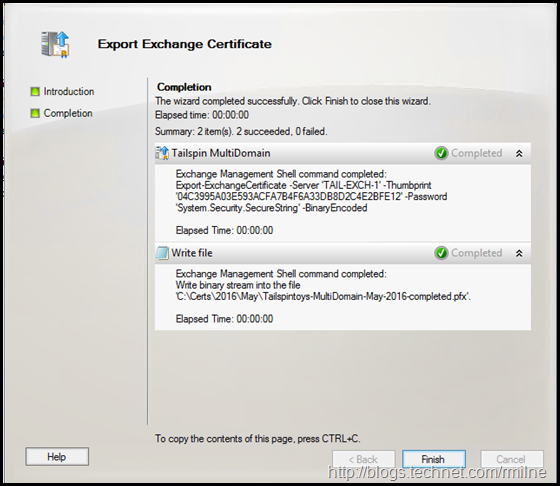
The export wizard completes, and the .PFX file is saved.
Import Exchange Certificate
Now that the .PFX file was created, this can be used to import the certificate onto the remaining server(s). Note that the file must be .PFX based as a .CER or .DER cannot contain a private key in Windows.
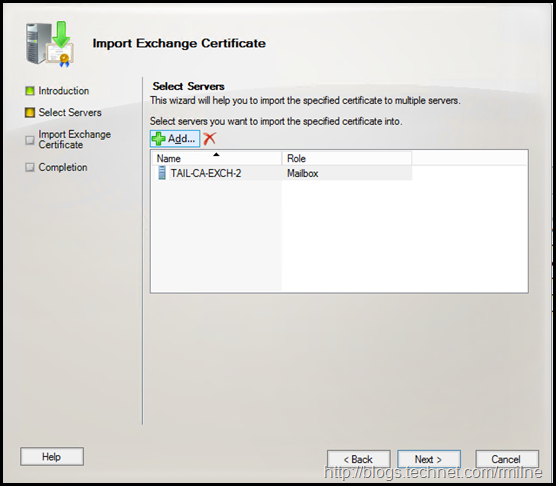
Select the server to import the certificate to.
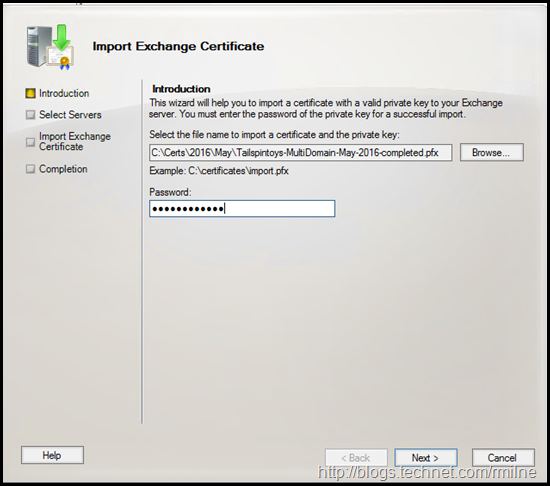
This will open the import wizard. After selecting the .PFX file, enter the password.
Additional servers can be selected here if required.
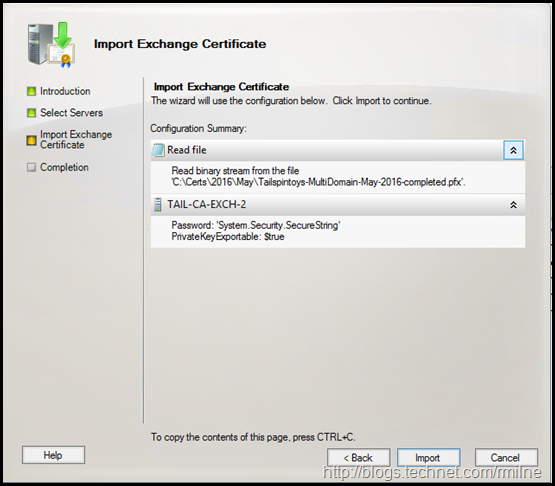
Once all additional servers have been added, click Next to start the import process.
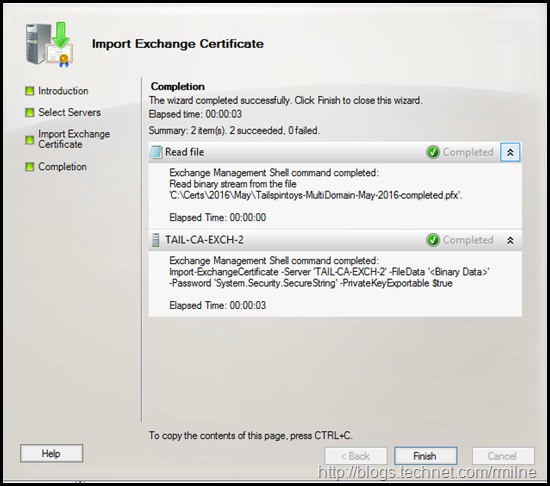
The import completes.
At this point the certificate is installed onto all servers. However it is not really used. Why not really, well some services will automatically use it.
Other services must be explicitly bound to the new certificate.
Assign Services to Certificate
The certificate can now be assigned to services. If this has an issue, there will be user impact. Thus this should be performed under a maintenance window.
As noted above, you will see that some servers are automatically bound to the services. This is normal.
We need to assign the new certificate to the main services such as IIS, UM and SMTP though.
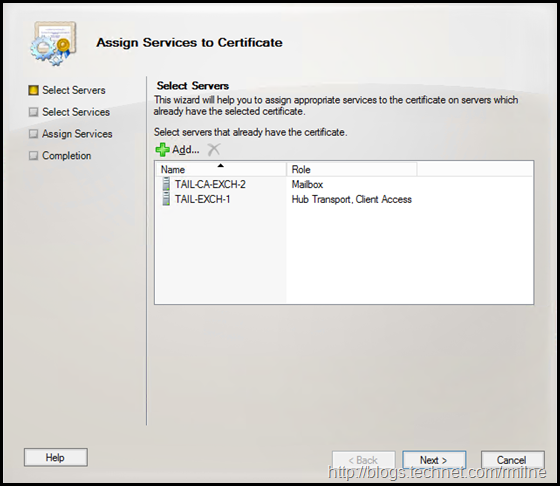
In the Assign Services to Certificate screen we can select the severs which already have this certificate installed. Since we did things correctly and have already installed the certificate onto all servers there are no unpleasant surprises here.
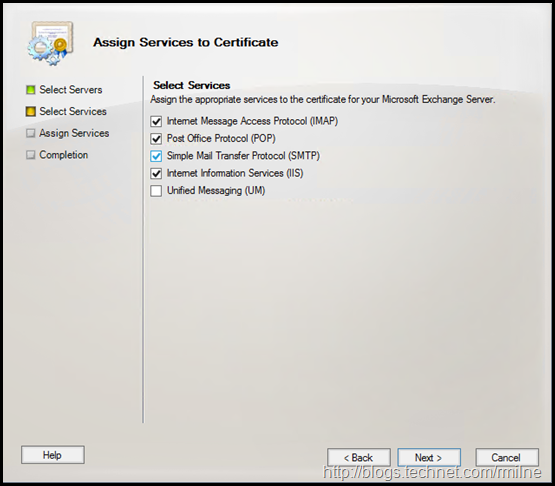
We can the select to bind the new certificate to the relevant services.
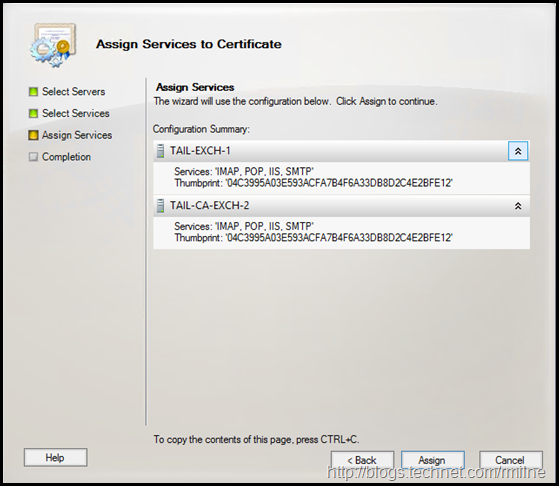
Then the service bindings are updated.
At this point the new certificate is bound to the specified services on the servers.
It is now time to test and validate the change. Ensure that you also take into consideration any other servers or devices which have this certificate installed such as VPN concentrators, SSL appliances or Load Balancers.
They must also be updated with the new certificate ASAP.
The old certificate should be archived and removed from the servers.
Cheers,
Rhoderick
