In the previous post Load Balancing Azure AD FS Services we looked at using Azure RM to deploy and load balance AD FS services. This is the follow-up post to deploy the Web Application Proxy (WAP) servers and its associated load balancer into the DMZ.
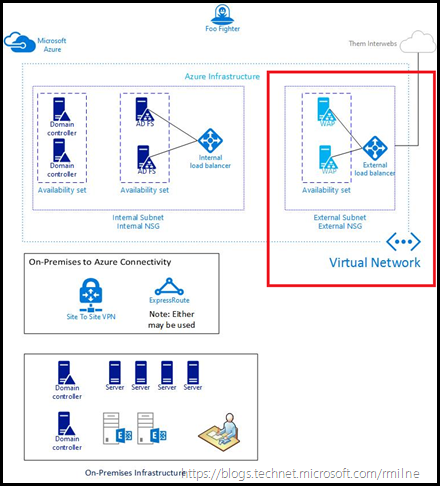
In this post we will focus upon the highlighted area in the below diagram. The additional components were previously deployed, for details please see Load Balancing AD FS Services In Azure RM.
Note that this post assumes all of the underlying network resources have been created at this point. This will include:
-
Network Security Groups10
-
Virtual networks
-
IP Subnets
-
Availability Sets
Install WAP
Please review the setup steps in the following series of posts. Post #2 covers installing WAP, though you must complete the AD FS install before configuring WAP since the WAP configuration is stored within AD FS.
As noted in the previous Azure RM post, ensure that you take the time to design the Azure environment so that there are no unexpected issues with the configuration. Pay particular attention to the networking design and layout.
The WAP servers should be assigned to their own Availability Set so that they may be added the external load balancer. The AD FS servers are in a separate Availability Set which is load balanced by the internal Load Balancer.
Once the WAP servers are up and running, we can then proceed to deploy the public Azure Load Balancer.
Load Balance WAP
In order to create, configure and use the Azure load balancer we need to:
-
Create the Azure public load balancer
-
Add back end pool
-
Add Windows Firewall Rule
-
Add probes
-
Add load balancing rules
-
Test WAP Servers
-
Update DNS
Create the Azure Public Load Balancer
At this point the AD FS and WAP server VMs have been created, and the AD FS and WAP services installed and configured. The first step to load balance the WAP portion is to create a new public load balancer in the Azure RM portal. Note that it is assumed that you have already created the network resources and have deployed the AD FS farm and the WAP servers. This post focuses only on the WAP load balancing deployment. See the image above for an example of how Network Security Groups (NSG) can be used to segregate traffic between AD FS and WAP servers.
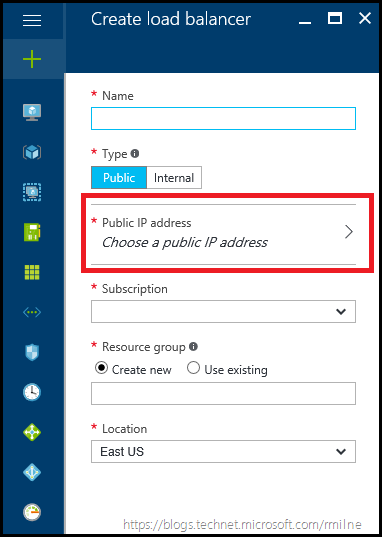
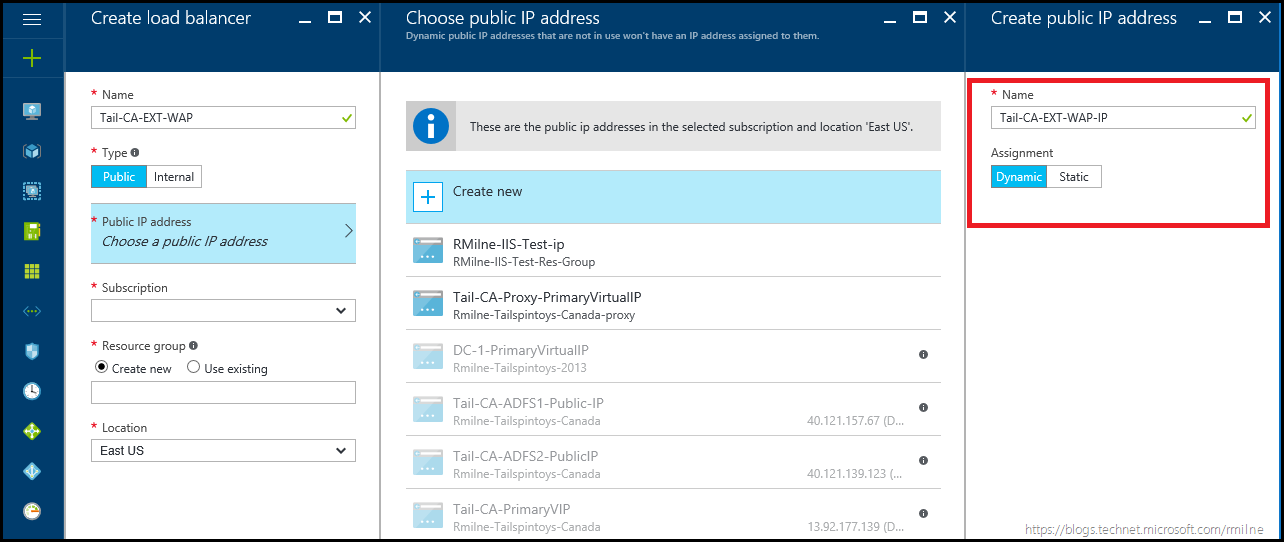
In the Azure RM portal, navigate to the Load Balancer section, and create a new Azure Load Balancer. Ensure that the type is set to public, and enter a descriptive name that is aligned with your Azure resource naming policy. You will also have to select which public IP address should be used.
In this case the external WAP load balancer will be called Tail-CA-EXT-WAP, and a new external IP address will be assigned to it. The external IP address resource is highlighted on the right
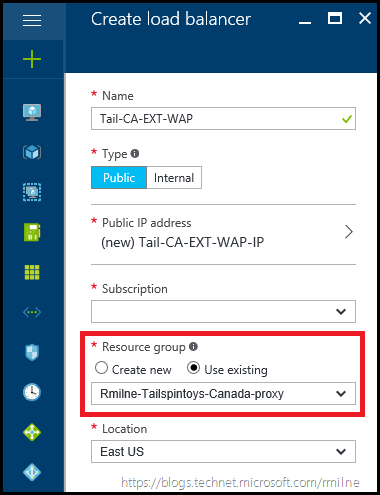
We then need to decide which Resource Group these resources will be stored in. In this case they will be stored in a Resource Group which is used to hold all of the WAP resources. Hence the existing Resource Group was selected from the drop down menu. The below image shows the completed settings.
Click create to launch the validation process, and if successful the public load balancer and external IP resources will be created in the assigned Resource Group.
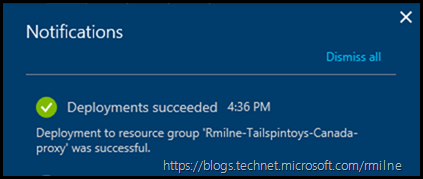
Wait for the notification that the operation has completed.
Add Backend Pool
You may need to click the refresh button to see the newly created public Azure Load Balancer. Once it is visible, navigate to the Backend Pools property sheet, and click the Add button to add in the relevant Backend infrastructure.
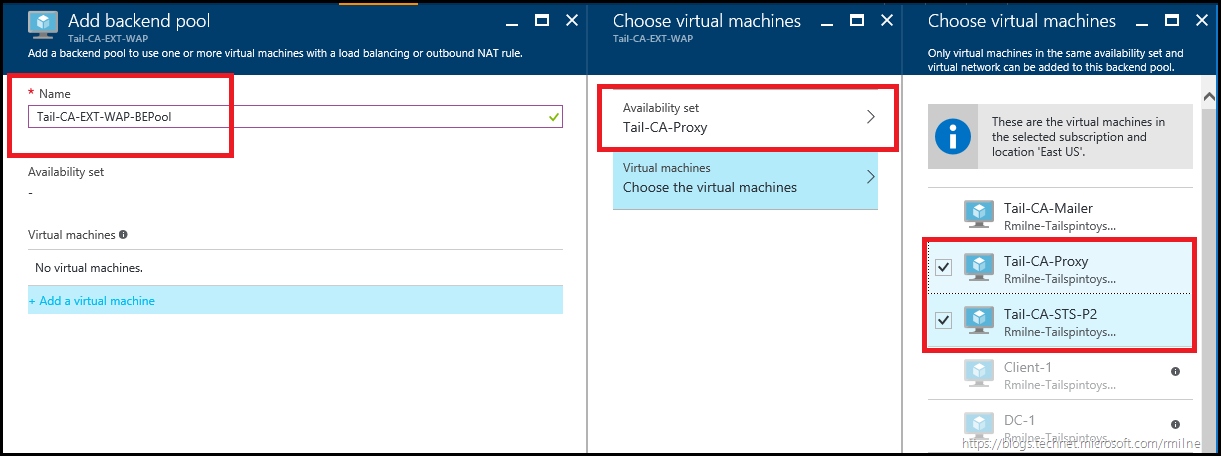
In this environment we will create the Backend pool called Tail-CA-EXT-WAP-BEPool.
We need to add the VMs – note that some of the the VMs are greyed out, as only VMs belonging to the selected Availability Set may be chosen.
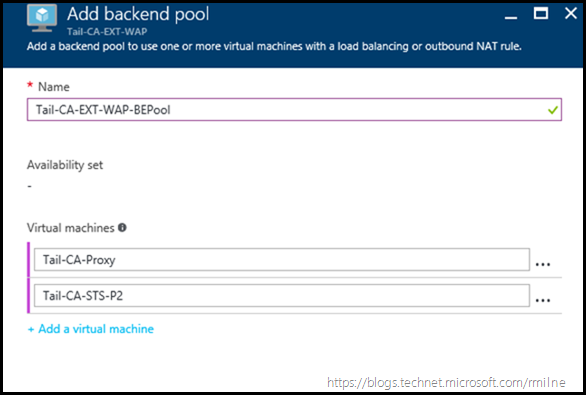
Select the required VMs, in this case only the two WAP servers were selected.
Click OK to save the configuration.
Once the changes have been saved, we can then move on to adding in the probes. But first we need to ensure that the local Windows Firewall will allow the probe traffic.
Add Windows Firewall Rule
As we discussed in Load Balancing Azure AD FS Services there is an option to monitor AD FS and WAP using HTTP on TCP 80. This will work out of the box on AD FS. However you will need to adjust the WAP servers default Windows firewall configuration to allow the HTTP traffic. It is blocked by default.
The below shows the rules on the AD FS server:
Note that the above highlighted rule does not exist by default on the Windows 2012 R2 WAP server, there is a rule to allow inbound TCP 443.
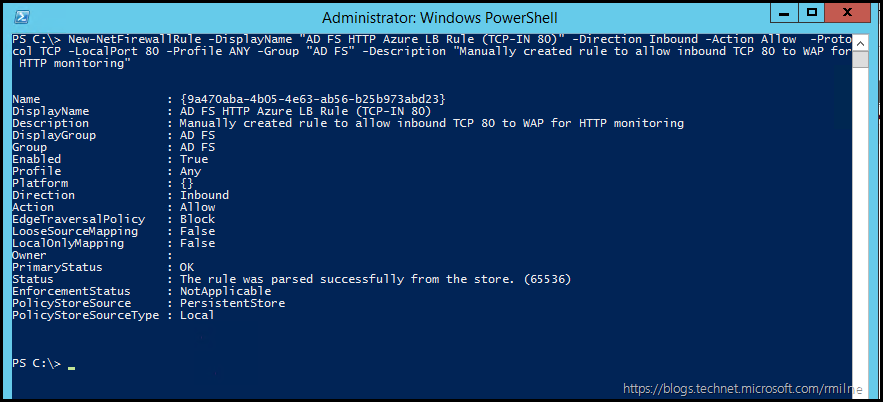
We can use the New-NetFirewallRule cmdlet to create a new rule. The below is an example you can use or customise, so change the name etc. as you see fit.
New-NetFirewallRule -DisplayName "AD FS HTTP Azure LB Rule (TCP-IN 80)" -Direction Inbound -Action Allow -Protocol TCP -LocalPort 80 -Profile ANY -Group "AD FS" -Description "Manually created rule to allow inbound TCP 80 to WAP for HTTP monitoring"
Add Probes
Once the Windows firewall has been updated on all the WAP servers, proceed to add the HTTP probe.
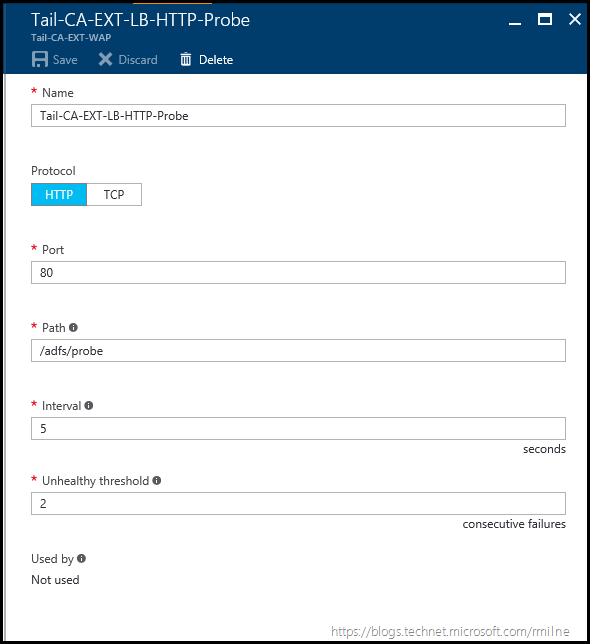
Select the probes section on the load balancer, and then click add. Fill in the necessary details. In the example below we will probe the AD FS servers on TCP 80 and query for the /adfs/probe endpoint. In this case the probe is saved as Tail-CA-EXT-LB-HTTP-Probe.
Add Load Balancing Rules
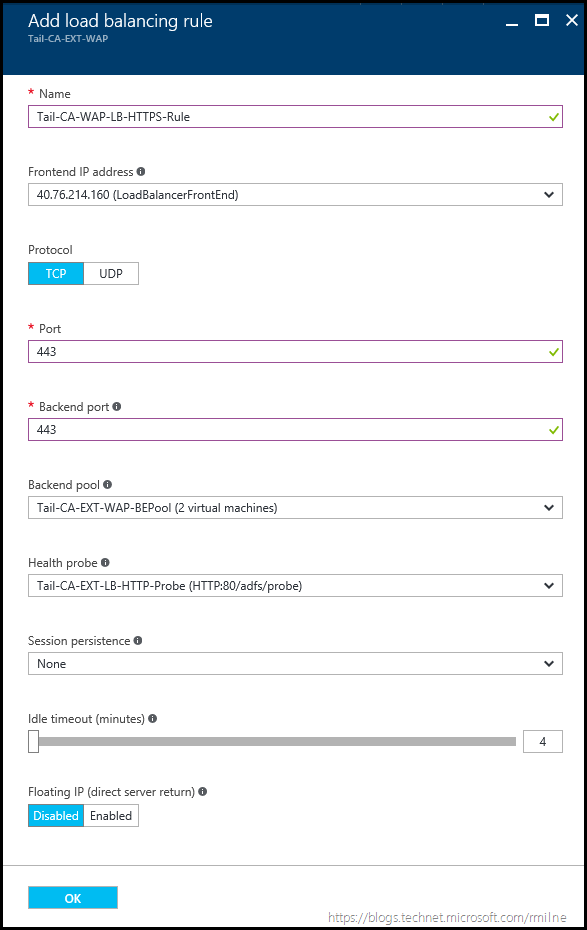
To complete the configuration on the Azure Load Balancer, we need to state how the traffic will be balanced. A new Load Balancing rule called Tail-CA-WAP-LB-HTTPS-Rule will be created to hold the configuration.
Note that the relevant Backend pools are selected, along with the Health probes and that TCP 443 is used for the frontend and backend port.
Click OK to save the configuration.
Test WAP Load Balanced VIP
We should now be able to verify that the WAP sign-on page is available externally.
If the external DNS record does not yet exist, or points to another farm use a hosts entry to resolve to the IP of the public load balancer. Please remember to remove or REM out the hosts entry when you are finished testing.
From an external test system you can then navigate to the AD FS namespace. This will be in the format of:
https://<AD FS name>.tailspintoys.ca/adfs/ls/idpinitiatedsignon.htm
In this case the AD FS namespace is adfs.tailspintoys.ca so the test URL is:
https://adfs.tailspintoys.ca/adfs/ls/idpinitiatedsignon.htm
Test individual WAP Servers
If you also want the ability to also test the individual WAP servers, you can add inbound NAT rules the the external load balancer. This way you can target the individual server, though you will need to use hosts file entries. Again be sure to remove or REM out the entry after you have finished testing so that it does not trip you up in the future.
Review to this post to for details. The post discusses RDP access, but the same applies for HTTPS.
Update DNS
Ensure that the external DNS zone has an entry for the AD FS namespace which resolves to the public IP of the load balancer. This may have been done previously, and if so this section can be ignored.
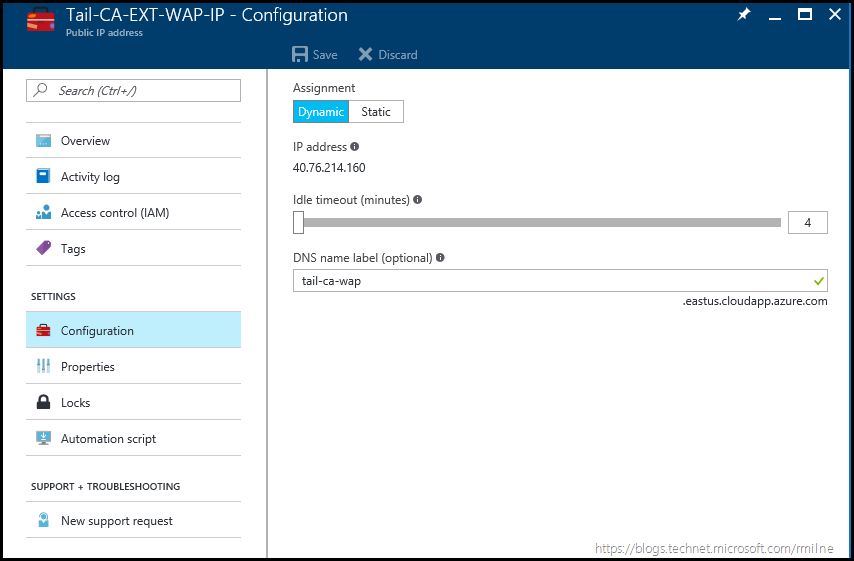
It is possible to add or edit a DNS name label associated to the Public IP resource, but this is not the name that should be used for AD FS. It should be the namespace that was selected as part of the design and built out of the AD FS infrastructure.
Cheers,
Rhoderick
