When initially deploying and configuring Office 365, one of the initial questions is to select the on-premises objects which will be replicated to Azure Active Directory. It is strongly recommended that all of the required directory and user hygiene is fully completed prior to the installation of Azure AD Connect. It is easier and simpler to remediate UPN, invalid SMTP domains and other issues prior to synchronising the objects to Azure AD.
This recommendation is not always followed. In some cases only a small subset of users are remediated and synchronised to Azure AD. The thought is that we can kick off the project, then look to remediate and synchronise the others as we go. This runs into an issue with Exchange pretty quickly. Exchange relies on Azure AD Connect to synchronise the directory data so it can be used to build up the GAL for the Exchange Online mailboxes.
Meh – but I can just type in the on-premises mailbox SMTP address. Who needs to select it from the GAL......
If you try that, then you will probably hit the SMTP delivery error mentioned in Delivery Failed From Office 365 Mailbox To On-Premises Exchange Mailbox
We will look at the symptoms and a couple of solutions.
Lab Configuration
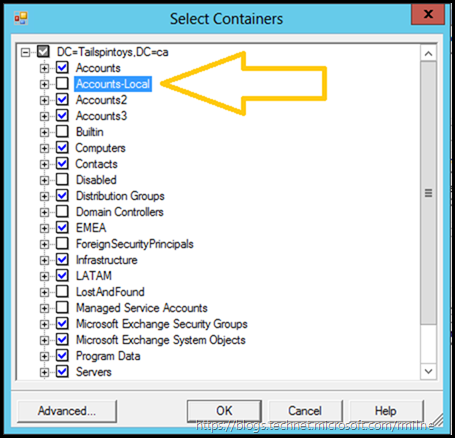
The configuration described here is to emulate the behaviour of not synchronising all object s to Azure AD. In this lab not all OUs are in scope for Azure AD Connect. In the below screenshot you can see the Accounts-Local OU is not enabled for synchronisation.
This lab currently has Exchange 2010 SP3 RU18 installed on-premises. This is not overly pertinent to the issue at hand, and is included for reference only.
Centralized Transport was enabled at the time of testing, but that does not assist with this issue.
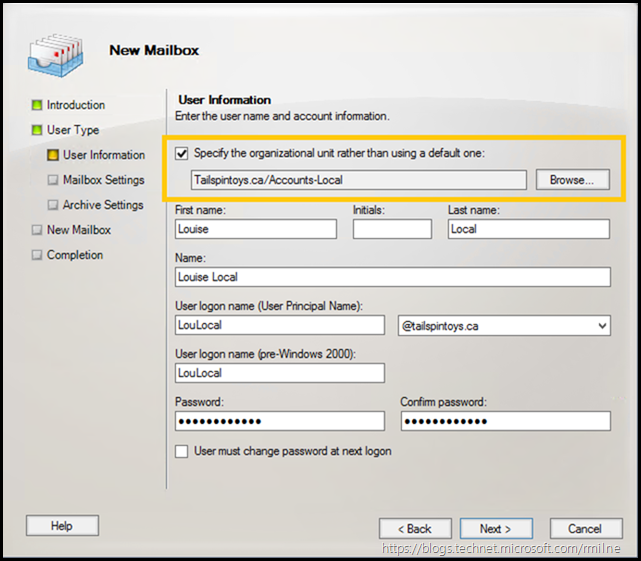
Let's create a new mailbox in the Accounts-Local OU. The selected OU is highlighted. The mailbox will be called Louise Local with an SMTP address of LouLocal@tailspintoys.ca
This could also be done in PowerShell if you prefer.
New-Mailbox -Name 'Louise Local' -Alias 'LouLocal' -OrganizationalUnit 'Tailspintoys.ca/Accounts-Local' -UserPrincipalName 'LouLocal@Tailspintoys.ca' -SamAccountName 'LouLocal' -FirstName 'Louise' -Initials '' -LastName 'Local'
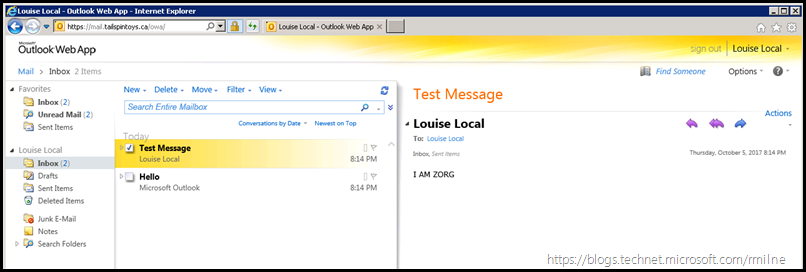
We then logon to the newly created mailbox using OWA. All is working as expected. The on-premises mailbox can send and receive to other people who are in the local Exchange infrastructure. The reason for using OWA is to remove the additional latency from Outlook cached mode.
A manual Azure AD Connect synchronisation was performed. The newly created Louise Local account was NOT discovered by Azure AD Connect since it is ignoring the content of the Accounts-Local OU.
Time to test!
Things Are Stormy In The Cloud
Now we switch to an Exchange Online Mailbox.
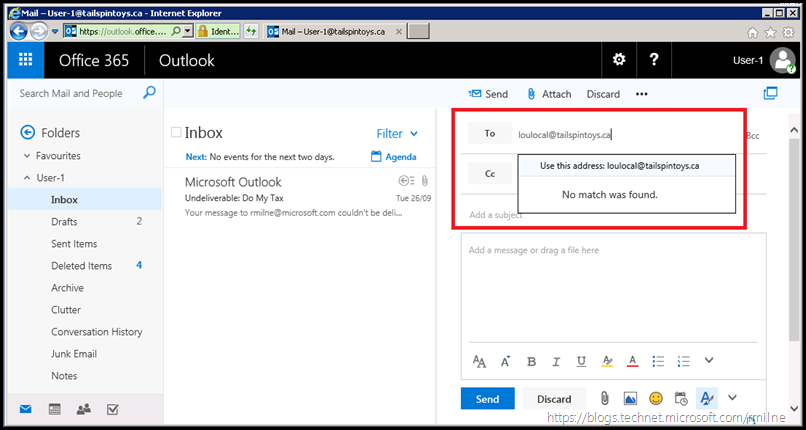
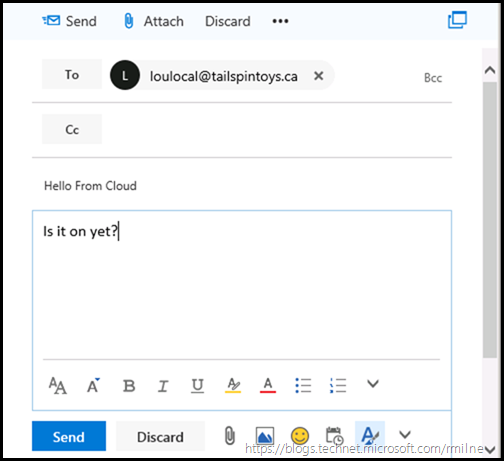
As expected, since the Louise Local object is not in scope for Azure AD Connect synchronisation there is no directory information for this person in Exchange Online. Note that even though the correct SMTP address was entered, OWA does not recognise the recipient. This is in the highlighted red box below.
Even though Exchange Online does not know of this use which you doth speak of, lets continue anyway....
Select to use this address, and then compose an email
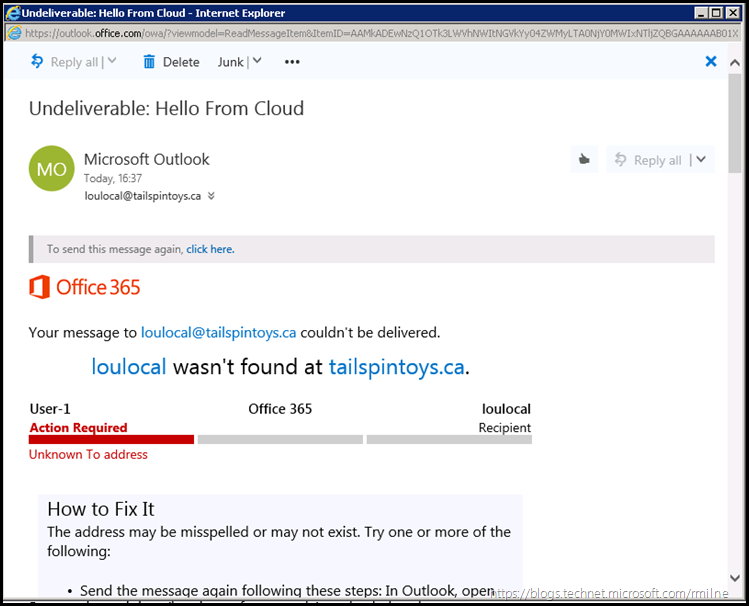
After clicking send, the below NDR will pop into your mailbox.
For search engines:
550 5.1.10 RESOLVER.ADR.RecipientNotFound; Recipient not found by SMTP address lookup
There are a couple of options open to us:
-
Change Accepted Domain In Office 365
-
Add Contacts to Office 365
What is the correct one to use? It is the consultant's answer "It depends..."
Once we have outlined each process, we will review the pros and cons.
#1 Change Accepted Domain
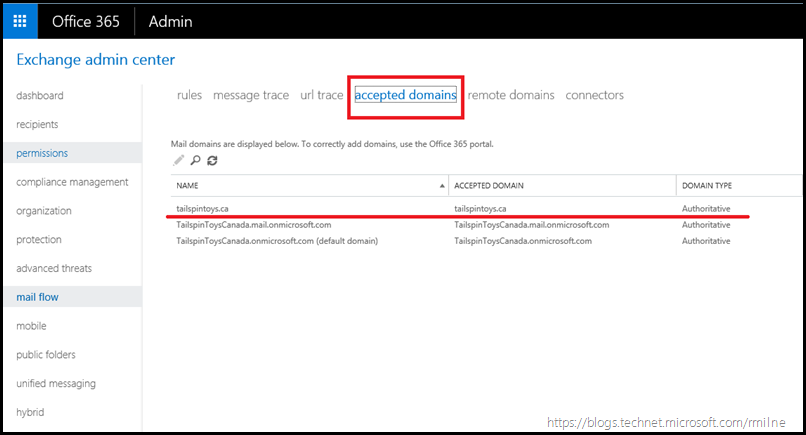
The default is that the Accepted Domains are of type Authoritative. This means that it is expected Exchange is authoritative for the domain, and knows about all mailboxes and recipients.
However, that is not the case in this situation. Exchange Online has no idea about all the on-premises mailboxes because you have not synchronised them using Azure AD Connect.
Since Exchange does not know about this mailbox call LouLocal@tailspintoys.ca it will reject the email.
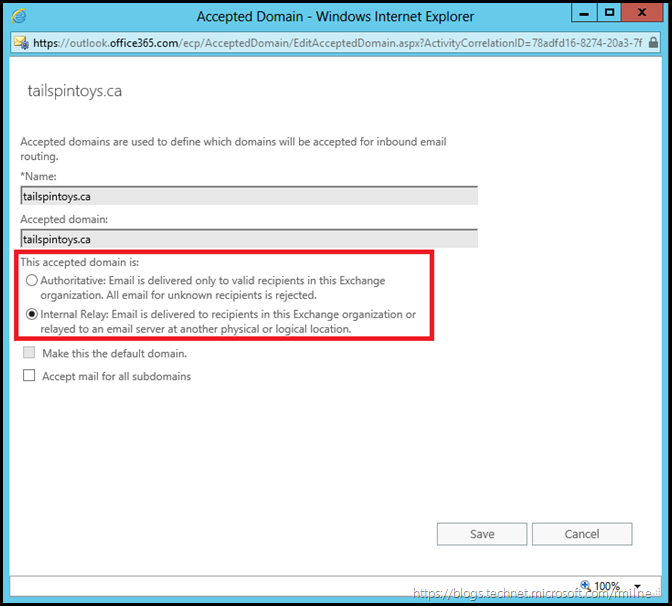
One option for a quick fix is to change the domain type from Authoritative to Internal Relay. In the case of this lab the domain is Tailspintoys.ca which is why we are changing that domain. Do not modify the others.
#2 Create Additional Objects For Non-Synchronised Objects
If the Accepted Domain is left as type Authoritative, then Exchange must be aware of all the recipients. This would normally happen using Azure AD Connect if it were set to synchronise all objects. Azure AD Connect would create the required objects in Azure AD.
Since Azure AD Connect is not configured to do this, then we need to do the work. This can be automated with PowerShell or you can create the entries manually. However this is going to be your process to manage. When you come to synchronise the "real" object to Azure AD, you will need to come back and delete your manually created contacts.
In the Exchange Admin Centre, navigate to Recipients then Contacts.
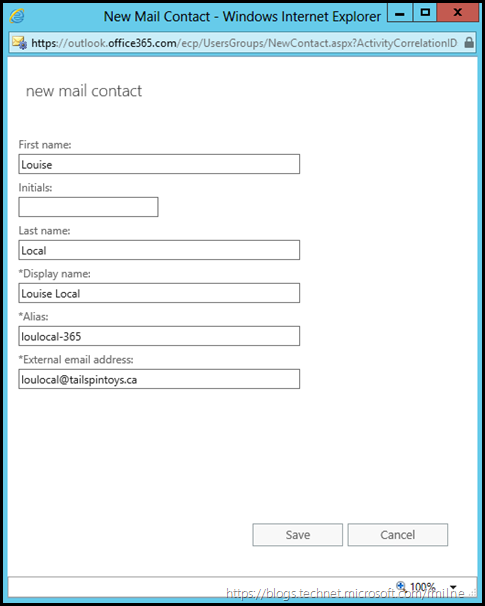
From here we can create a new contact. This points to the SMTP address used by the on-premises mailbox. I chose to add a suffix to the alias to allow it to be easily distinguished.
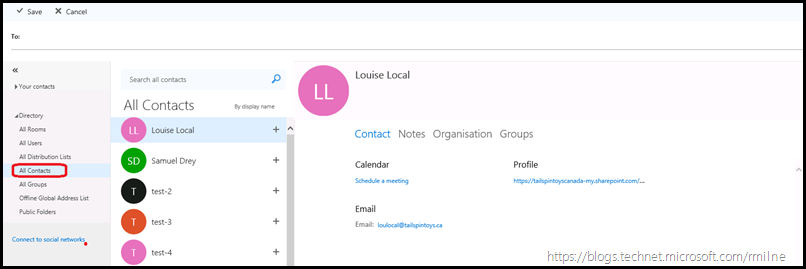
Now when we send an email we can also browse and select the contact object from the picker:
Things Are Sunny In The Cloud
After changed the domain to be Internal Relay, or creating a contact, we will have a mulligan on the email test. Make sure to wait to allow for the changes to fully propagate through Office 365.
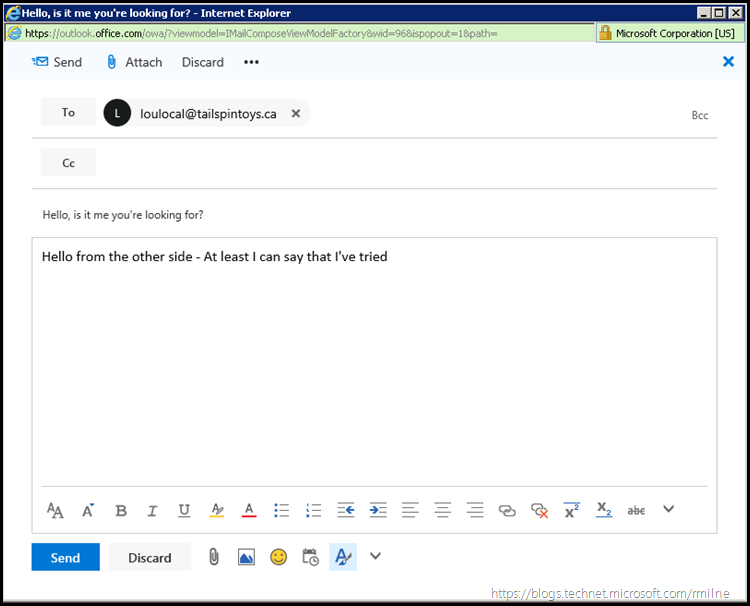
Again OWA is used to compose a message back to the on-premises mailbox.
A close up shows the correct SMTP address was used.
And Win! The message was delivered to the on-premises mailbox.
Mail Note
If we look at the documentation to Manage accepted domains in Exchange Online, pay particular attention to the highlighted section below:
There are two types of accepted domains, Authoritative and Internal Relay, which can be defined as follows:
- Authoritative – Selecting this option means that email is delivered to email addresses that are listed for recipients in Office 365 for this domain. Emails for unknown recipients are rejected.
- If you just added your domain to Office 365 and you select this option, it’s critical that you add your recipients to Office 365 before setting up mail to flow through the service.
- This option is typically used when all the email recipients in your domain are using Office 365. You can also use it if some recipients exist on your own email servers. However, if recipients exist on your own email servers, you must add your recipients to this Office 365 domain in order to make sure that mail is delivered as expected. For more information about how to manage your recipients, see Manage mail users in EOP.
- Setting this option enables Directory Based Edge Blocking (DBEB). For more information about DBEB, see Use Directory Based Edge Blocking to Reject Messages Sent to Invalid Recipients.
- Internal relay – Selecting this option means that recipients for this domain can be in Office 365 or your own email servers. Email is delivered to known recipients in Office 365 or is relayed to your own email server if the recipients aren’t known to Office 365.
- You should not select this option if all of the recipients for this domain are in Office 365.
- If you select this option, you must create a connector for mail flow from Office 365 to your on-premises email server; otherwise recipients on the domain who are not hosted in Office 365 won’t be able to receive mail on your own email servers. For more information about setting up connectors, see Set up connectors to route mail between Office 365 and your own email servers.
- This option is required if you enable the subdomain routing option on a domain in order to let email pass through the service and be delivered to any subdomains of your accepted domains. For more information, see Enable mail flow for subdomains in Exchange Online.
Ideally you will have remediate AD and cleaned up all the objects so that you can install Azure AD Connect and get it to synchronise all of the required objects. That will avoid many issues, and not just the mail flow one which is discussed in this post.
That is the preferred solution since it saves have to do more work to create additional contact objects or to reduce the security on the Accepted Domain. We do want to leverage DBEB so that we can limit what mail flows in.
Cheers,
Rhoderick
