Since we are still in the early stages of the year, and Exchange 2013 SP1 is now available, we will see lots of migrations to Exchange 2013. Exchange 2013 can be deployed into an existing Exchange organisation where Exchange 2007 SP3 RU10 + and/or Exchange 2010 SP3 exists.
Let's look at an issue that can arise in an Outlook Anywhere co-existence scenario with Exchange 2007 and 2013. After walking through the scenario we will see what can be done about it and review a couple of other issues that will probably crop up, for example IIS permissions.
Update 27-3-2014: Added link to TechEd 2013 Outlook Anywhere session. Tightened up client auth wording.
Update 12-11-2014: Updated reference to OA traffic flow from Gavin's feedback.
Update 12-11-2014: Updated reference for disabling IPv6
Update 16-6-2016: Updated PowerShell Example to use code formatting, and to also set client auth to be NTLM.
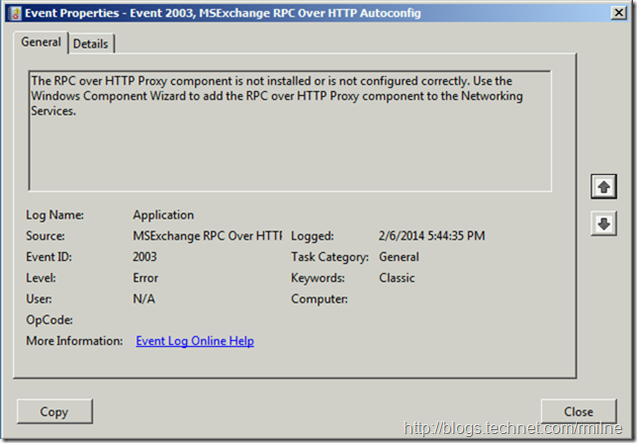
Since some customers may not already have Outlook Anywhere (OA) enabled, and are lighting it up to permit co-existence with Exchange 2013, they may run into issues if the required OS bits are not deployed on the older versions of Exchange. You may receive EventID 2003 stating that the RPC over HTTP proxy component is not installed of is not configured correctly. Note that enabling OA on the legacy Exchange servers is not a requirement unless you want to start using OA for legacy mailboxes as well as Exchange 2013 mailboxes.
It is possible to install Exchange 2007 and enable Outlook Anywhere without installing the required underlying OS component. This is the RPC/HTTP proxy component that was introduced in Windows 2003 and allowed for the introduction of RPC/HTTPS. Since Exchange 2007’s Outlook Anywhere requires the RPC/HTTP component, it will not work without it. Funny that, eh?
Install Exchange 2007 Sans RPC/HTTP
We start this scenario with a base Windows 2008 R2 SP1 Installation. The telnet client is installed, and nothing else just to prove that the Get-WindowsFeature cmdlet is working. :
Since we are using Exchange 2007 on Windows Server 2008 R2 SP1, we will not be prompted to download and install additional hotfixes. So let’s focus on installing Exchange!
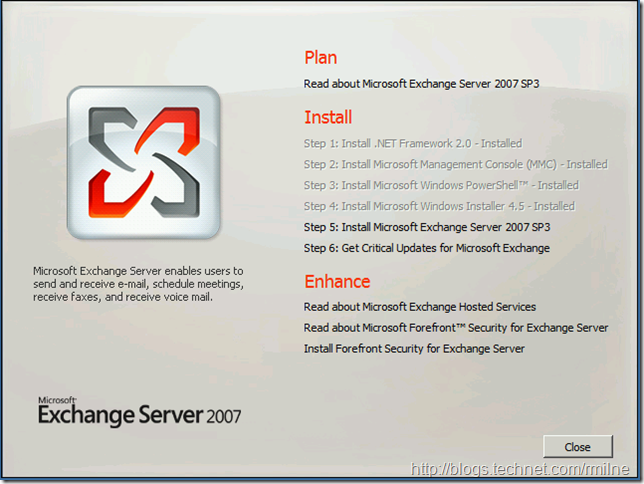
Slapping in the CD, and the splash screen launches.
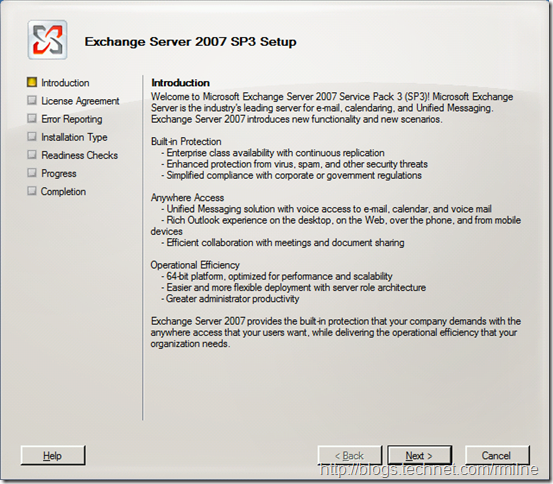
The familiar Exchange 2007 introduction screen appears, and after reading it fully we move on to the next screen:
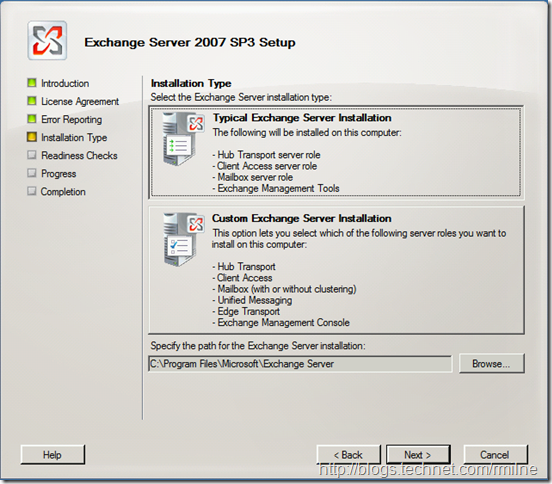
And we choose the typical installation type. There is a reason for not splitting the roles, and we shall get to that at the end of the post! Then we click Next.
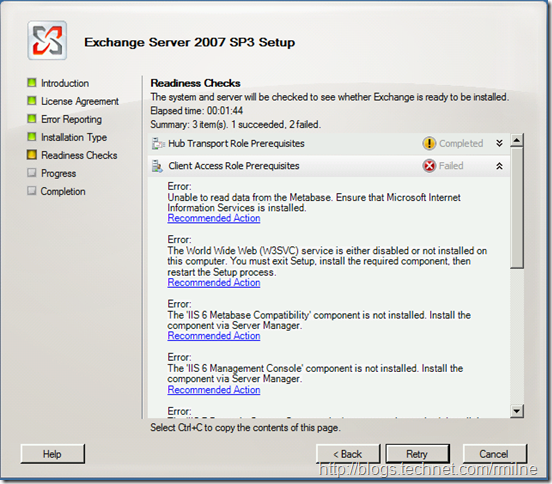
As expected since this is a base OS, the Exchange readiness check fails as we are missing IIS and other OS bits.
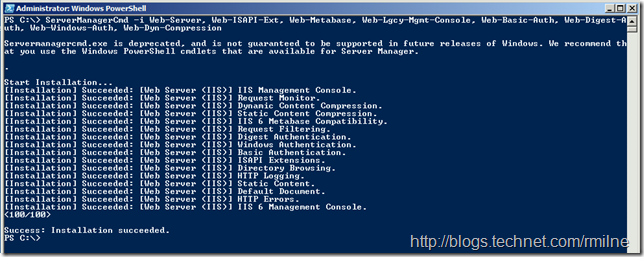
To install the missing OS bits, we can grab the pre-canned OS requirement commands from TechNet. Since we are installing a server with CAS, Mailbox and HUB these OS bits must be installed:
ServerManagerCmd -i Web-Server
ServerManagerCmd -i Web-ISAPI-Ext
ServerManagerCmd -i Web-Metabase
ServerManagerCmd -i Web-Lgcy-Mgmt-Console
ServerManagerCmd -i Web-Basic-Auth
ServerManagerCmd -i Web-Digest-Auth
ServerManagerCmd -i Web-Windows-Auth
ServerManagerCmd -i Web-Dyn-Compression
If the server will support Outlook Anywhere clients, install the RPC over HTTP proxy feature by running the following command:
ServerManagerCmd -i RPC-over-HTTP-proxy
For ease we will typically use something like the below which is one line. Please beware that it does not wrap:
ServerManagerCmd -i Web-Server, Web-ISAPI-Ext, Web-Metabase, Web-Lgcy-Mgmt-Console, Web-Basic-Auth, Web-Digest-Auth, Web-Windows-Auth, Web-Dyn-Compression, RPC-over-HTTP-proxy
Since folks may copy the above to install a server, the command is complete and includes the RPC/HTTP proxy component. However note that in the below example I have deliberately omitted the RPC/HTTP proxy Windows component, else our scenario will not play out!
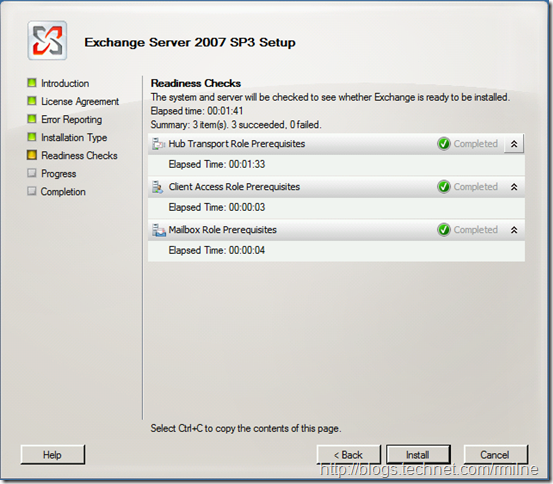
Groovy, so we have the OS bits installed, and after a swift reboot we can then go and resume our Exchange installation. Again choosing the same options as before, the readiness check now passes. Green ticky-ticky all around!
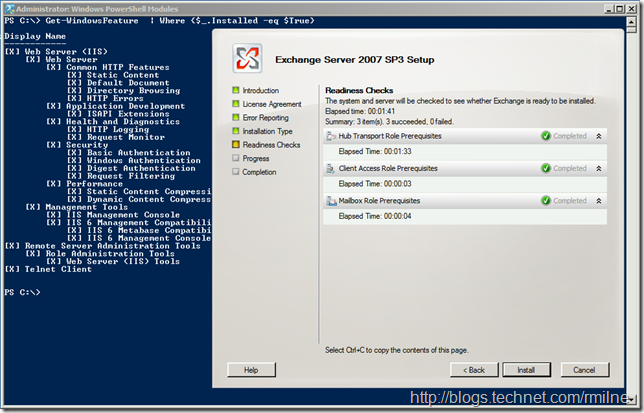
Note that the RPC/HTTP proxy component is not installed. This can be verified by the Get-WindowsFeature output in the background.
One Exchange installation completes, the server should be restarted, and the latest RU installed. At the time of writing this was Exchange 2007 SP3 RU13.
As you saw, it is possible to install Exchange 2007 CAS role, without installing the RPC/HTTP proxy. Let’s move on to enabling Outlook Anywhere on the server, and see what happens!
Enabling Outlook Anywhere Sans RPC/HTTP
Exchange 2007 will not check that the RPC/HTTP proxy component has been installed prior to enabling Outlook Anywhere.
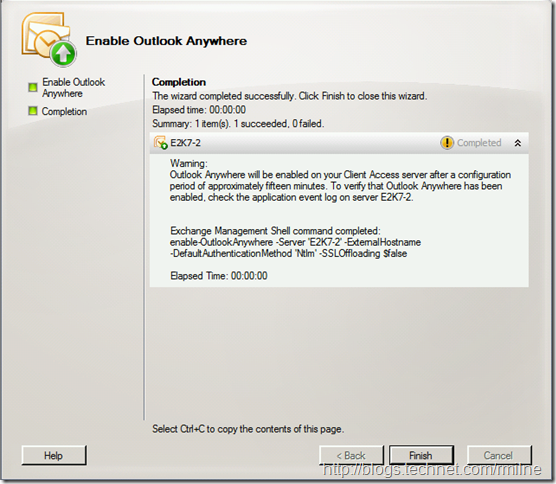
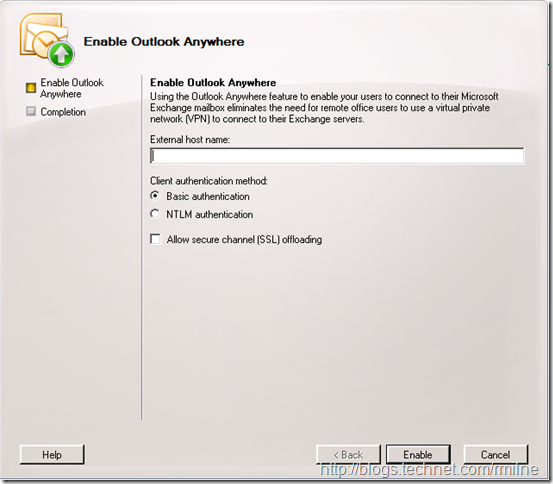
Thus after Exchange 2007 is installed, we can enable Outlook Anywhere on this server, even without the RPC/HTTP component being installed:
Impact of Enabling Outlook Anywhere Sans RPC/HTTPS
In a nutshell, it is not good!
Exchange does not have a mechanism to convert the HTTPS traffic to RPC, so Outlook Anywhere will not work at all on this server.
If you are monitoring the event logs (as you should be) Exchange does detect that something is not right. Exchange will check and realises the RPC/HTTP component is not present. This generates the error 2003 stating that the RPC over HTTP component is not installed or is not configured correctly.
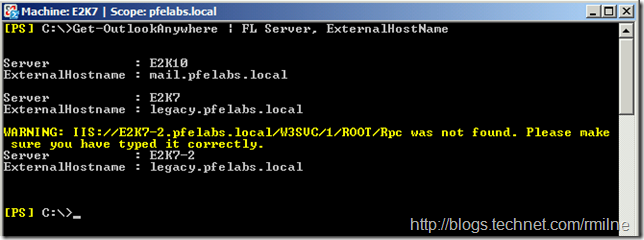
If you do open up Exchange Management Shell and look for the Outlook Anywhere settings, you will see that the Get-OutlookAnywhere cmdlet discovers that the /RPC virtual directory is not present since the RPC/HTTP component is not installed. For details on checks (and the time taken) made to virtual directories when running cmdlets, please also see this post.
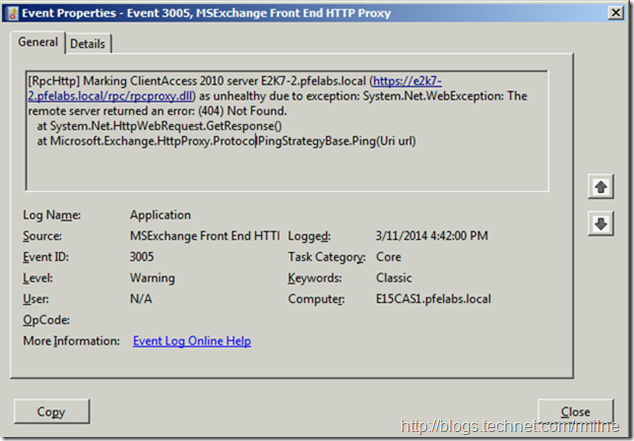
Exchange 2013 CAS will also detect that something is amiss and write an error to its application event log. This will manifest itself as error 3005 from MSExchange Front End HTTP Proxy stating which server that it found an issue with. There are a few variants of this, with errors ranging from 404 to other HTTP error codes depending upon the issue at hand. In this case the error is a 404 since the RPCProxy.dll is not present.
Note that the error string states that this is a Client Access 2010 server, but in fact this is an Exchange 2007 box. Don't let that confuse you!
One other thing that you may notice for Exchange 2013’s proxy and redirection behaviour is the URL that is used to connect to legacy Exchange servers. Exchange 2013 will build a URL to match the FQDN of the server in question. I’ll save the details on that for a later post as it would add too much here.
Exchange 2007 & 2010 Required IIS Permissions
If you are currently using Outlook Anywhere in your Exchange 2007 or 2010 environments, in order to allow your Exchange 2013 Client Access Server to proxy connections to your Exchange 2007/2010 servers, you must enable and configure Outlook Anywhere on all of the Exchange 2007/2010 CAS in your organization.
When configuring Exchange 2007 Outlook Anywhere or Exchange 2010 Outlook Anywhere using the Exchange Management Console there are options to enable either basic or NTLM authentication.
The one originally chosen when deploying those servers depended upon your design which was in turn influenced by factors like client authentication requirements and NTLM support (or rather lack of) on any device that publishes Outlook Anywhere to the Internet.
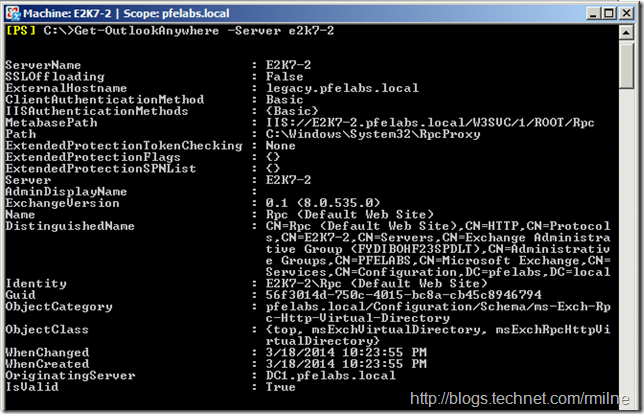
If you configured Exchange 2007 Outlook Anywhere to use Basic auth, then you will see this in PowerShell:
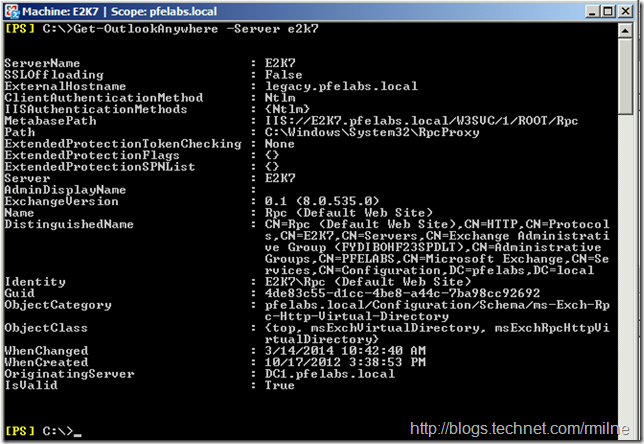
Note that this is a separate server. This one is imaginatively called E2K7-2. If NTLM was used:
Note the two different authentication settings that are listed. ClientAuthenticationMethod and IISAuthenticationMethods. For the detail oriented people out there, you saw that one was plural and the other singular.
If you configure OA for Basic auth, then the ClientAuthenticationMethod and IISAuthenticationMethods are both set to Basic. The same is true for when OA is set to NTLM auth. In that case ClientAuthenticationMethod and IISAuthenticationMethods are both set to use NTLM.
When co-existing Exchange 2007 and 2010 with Exchange 2013, we need to ensure that the correct authentication settings are in place. There are two things that we need to pay attention to. Authentication at the IIS layer and authentication at the client layer. This is the IISAuthenticationMethods and ClientAuthenticationMethod properties respectively.
The Exchange Server Deployment Assistant notes that to allow CAS 2013 to proxy Outlook Anywhere connections to Exchange 2010 and 2007, Outlook Anywhere must be enabled and properly configured on Exchange 2007 and 2010. If Outlook Anywhere was previously deployed, then ensure that their configuration will support Exchange 2013. The follow permission considerations need to be addressed:
-
Client authentication, which is used to allow clients like Outlook 2013 to authenticate with Exchange is properly configured. The same consistent NTLM OA client authentication scheme should be deployed on legacy CAS and CAS 2013.
-
Internet Information Services (IIS) authentication, which is used to allow Exchange servers to communicate must include NTLM auth.
As an example to set NTLM client auth on Exchange 2007. The required permissions on Exchange 2007 and 2010 can be set using Set-OutlookAnywhere:
Set-OutlookAnywhere -Identity 'ServerNameRpc (Default Web Site)' -ClientAuthenticationMethod NTLM -SSLOffloading $False –ExternalHostName -Exchange2013HostName -IISAuthenticationMethods NTLM, Basic
Setting multiple permissions on the IISAuthenticationMethods is probably a bit of a change compared to how we were previously configuring Outlook Anywhere. There have also been some interesting discussions on this topic in the past.
Permissions for Outlook Anywhere coexistence were also discussed by Greg Taylor, in a style that only Gregg manages to get away with, at Tech Ready 2013 NA in session OUC-B313. We should shoot who names these sessions….. The video, PowerPoint and podcast for this and all the other available Exchange TechEd 2013 sessions are here.
Without getting into the entire CAS namespace discussion, if you want all Outlook Anywhere traffic to flow via CAS 2013 a critical point is that the Exchange 2007 Outlook Anywhere external URL is set to the external hostname of the Exchange 2013 server. This is discussed in great detail in this post on EHLO by Ross.
Disabling IPv6 On Exchange 2007
Before you install Exchange 2013, you might need to disable IPv6 on some of your Exchange 2007 servers. Some connections between Exchange 2007 and Exchange 2013 don't work correctly when IPv6 is enabled and an Exchange 2007 server has both the Mailbox and Client Access server roles installed.
If you have Exchange 2007 servers that have both the Mailbox and Client Access server roles installed, complete the following steps on each of those servers to disable IPv6 on them. To do so
- Navigate to HKEY_LOCAL_MACHINESYSTEMCurrentControlSetServicesTcpip6Parameters
- If the DisabledComponentsentry doesn’t exist, do the following to create it:
- In the Edit menu, click New, and then click DWORD (32-bit) Value.
- Type DisabledComponents and then press enter.
- Double-click DisabledComponents.
- In the Value data field, enter 0xFF
Note that the recommendation is not to use 0xFFFFFFFF nowadays, and 0xFF should be used instead. Please see this post on disabling IPv6.
Alternatively, if you want to automate this, you can use something like the following.
To Set The DisabledComponents Registry Key
Reg.exe Add HKEY_LOCAL_MACHINESYSTEMCurrentControlSetServicesTcpip6Parameters /T REG_DWORD /V DisabledComponents /D "0xFF"
To Check For The DisabledComponents Registry Key
Reg.exe Query HKEY_LOCAL_MACHINESYSTEMCurrentControlSetServicesTcpip6Parameters /V DisabledComponents
This issue is discussed in the Exchange Deployment Assistant and also KB 2794253.
Cheers,
Rhoderick

